5 Common Plumbing Emergencies and Quick Fixes
Plumbing emergencies can cause serious damage if not addressed quickly. From burst pipes to clogged drains, these issues often strike without warning, leading to costly repairs and water damage. Knowing how to act fast can save you time, money, and stress. Here’s a quick overview of common plumbing problems and how to manage them:
- Burst Pipes: Shut off the main water supply, drain the system, and apply temporary fixes like plumber’s tape or repair clamps until a plumber arrives.
- Clogged Drains: Use hot water, plungers, or a drain snake to clear blockages caused by hair, grease, or debris. Avoid chemical drain cleaners.
- Leaking Faucets: Replace worn washers or O-rings to stop water waste and prevent higher utility bills.
- Running Toilets: Check and adjust the flapper, fill valve, or chain to stop water from continuously flowing.
- Water Heater Issues: Turn off the water and power supply, drain the tank, and inspect for leaks or sediment buildup.
Acting quickly is key. Shut off water valves, clean up standing water, and call a plumber for major issues like sewer line blockages or water heater malfunctions. Regular maintenance can also prevent future problems and reduce repair costs.
Controlling Plumbing Emergencies | Ask This Old House

Burst Pipes
When a pipe bursts, quick action is absolutely necessary. Burst pipes rank among the most damaging plumbing emergencies homeowners can encounter. Between 2013 and 2017, there were over 10,000 water damage claims filed due to such incidents. Knowing the causes of burst pipes and how to act swiftly can save you from hefty repair bills.
What Causes Pipes to Burst
One of the most common reasons is freezing temperatures. When water inside pipes freezes in unheated areas like basements, crawl spaces, or exterior walls, it expands. This creates pressure that can exceed the pipe’s capacity, leading to bursts.
High water pressure is another major factor. Most pipes are designed to handle pressure between 50 and 80 PSI. When the pressure goes beyond this range, it can cause the pipes to rupture.
Aging and corroded pipes also pose a risk. Homes with older plumbing systems, especially those using materials like galvanized steel or cast iron, are more susceptible because these materials deteriorate over time. Hard water can speed up the corrosion process by leaving mineral deposits that weaken the pipe walls.
Other culprits include tree roots invading underground pipes, severe clogs that create back-pressure, sudden valve closures (causing a phenomenon known as water hammer), accidental damage during renovations, and improper installation. Any of these issues can lead to severe pipe damage and costly property loss.
Emergency Repair Steps
If you’re dealing with a burst pipe, here’s how to manage the situation until professional help arrives:
- Shut off the main water supply. Find the main shut-off valve (usually near the water meter or where the main line enters your home) and turn it clockwise to stop the water flow.
- Drain the system. Open all faucets, starting with those on the upper floors, and flush toilets to release any remaining water. This reduces pressure and limits further leakage.
- Inspect the damage. Look for cracks, holes, or breaks in the pipe. Smaller leaks may require different solutions than large ruptures.
- Apply temporary fixes. For minor leaks, wrap plumber’s tape tightly around the damaged area. For larger holes, use epoxy putty to seal the break and smooth it over.
- Use repair clamps. For significant damage, place a rubber gasket over the leak, secure it with a metal clamp, and tighten it evenly to create a temporary seal.
- Remove standing water. Use towels, mops, or a wet/dry vacuum to clean up any water. Improve airflow by opening windows or using fans to dry out the area.
These steps can help minimize damage until you can address the issue more permanently.
Tools Needed and When to Call a Professional
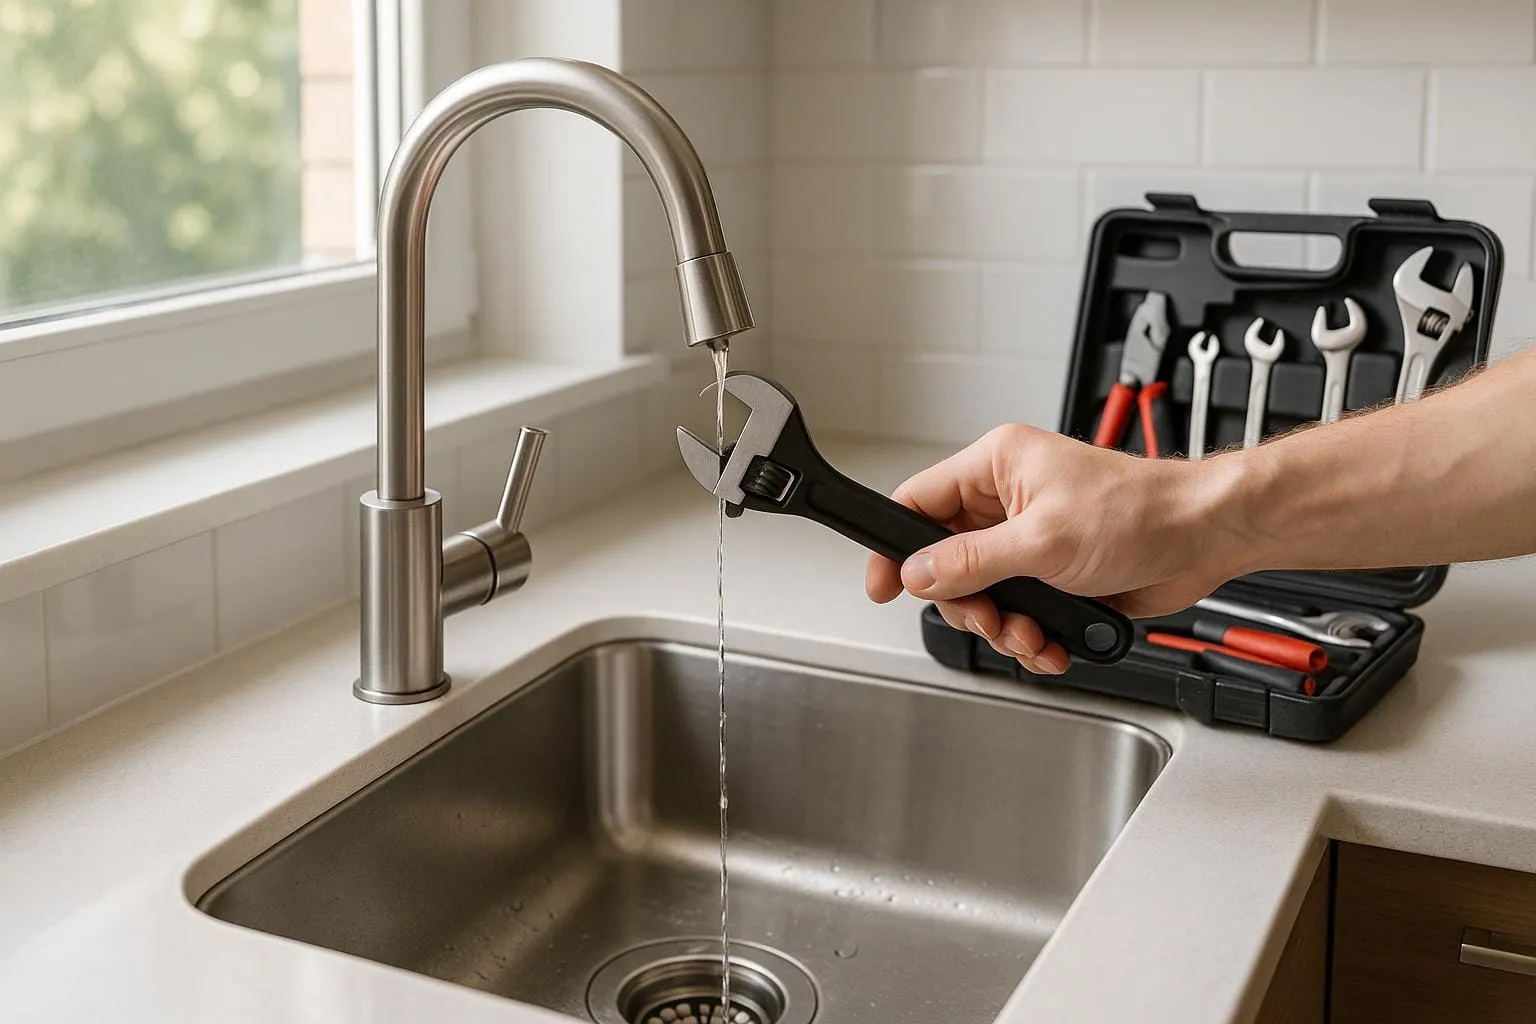
For handling burst pipe emergencies, keep these tools on hand: adjustable wrenches, pipe wrenches, pliers, pipe cutters or hacksaws, and a variety of repair clamps. You’ll also need materials like plumber’s tape, epoxy putty, pipe fittings (like couplings and elbows), and replacement pipe sections that match your plumbing system. A bucket, towels, and a wet/dry vacuum are essential for cleaning up water.
However, some situations call for professional help. If the burst pipe is located in a hard-to-reach area (like inside walls or underground), or if the damage involves multiple sections, electrical hazards, or major structural water damage, it’s best to contact a plumber immediately.
Avoid DIY repairs if you notice a gas smell, sparks, foundation damage, or anything that feels unsafe. Even after applying temporary fixes, a professional plumber should inspect and complete permanent repairs to ensure the issue is fully resolved.
To avoid future problems, watch for warning signs like reduced water flow, strange pipe noises, water stains or puddles, bulging pipes, foul odors, discolored water, unusually high water bills, or fluctuating water pressure. Catching these early can help you prevent costly damage down the line.
Clogged Drains
Clogged drains can be one of the most aggravating plumbing issues to deal with. Unlike a burst pipe that demands immediate attention, clogged drains often develop slowly, giving you time to diagnose and address the issue before it becomes a full-blown blockage. Knowing what causes these clogs and how to handle them can save you both time and money.
The usual suspects behind clogged drains include hair, soap scum, grease, food waste, and small objects. In bathrooms, hair often combines with soap residue to create stubborn blockages. In kitchens, grease and food particles can solidify and obstruct pipes. Dirt tracked in from outside, excessive toilet paper, hygiene products, mineral buildup from hard water, and even tree roots infiltrating underground pipes are other common culprits. With over 500,000 plumbers working in the U.S. in 2019, clogged drains are clearly a common household issue.
Finding the Source of Drain Clogs
Pinpointing whether the problem lies in a single drain or the main sewer line is essential for determining your next steps. If only one fixture is affected - like a slow-draining bathroom sink or a shower that backs up - the issue is likely localized. Hair, soap buildup, or debris are often to blame.
However, if multiple drains in your home are slow at the same time - such as the kitchen sink, bathroom sink, and shower - it’s likely a main sewer line blockage. This type of problem requires specialized tools and possibly professional help.
Watch for these warning signs of a clog: water draining slower than usual, standing water that won’t go down, unpleasant odors from drains, toilets that don’t flush properly, water backing up in other fixtures, stains around drain openings, debris in standing water, or even an increase in insects near drains. Gurgling sounds from other drains when using water elsewhere in the house can also signal a deeper blockage in your plumbing system.
Once you’ve identified the source of the problem, you can move on to clearing the blockage.
How to Clear Blocked Drains
Start with simple solutions before trying more advanced methods. Sometimes, hot water is all you need to dissolve grease clogs in a kitchen sink. Fill the sink with hot water, add a small amount of liquid dish soap, and then release the stopper to create a rush of water as it drains.
Plungers are another effective tool for many clogs. Use a standard household plunger to create pressure and dislodge the blockage. Make sure the plunger is fully submerged and plunge with force.
For hair clogs, manual removal is often the best approach. A straightened wire hanger or an inexpensive plastic drain snake (around $3) can help you pull out hair and other debris. Remove the drain cover if possible and carefully fish out any visible blockages.
“Do not pour grease down the drain! Use a strainer, avoid fat, and avoid garbage disposals.”
Doug Hughes, Home Owner and Fixer
For more stubborn clogs, try the baking soda and vinegar method. Pour one cup of baking soda down the drain, followed by one cup of white vinegar. Let the mixture sit for 15 minutes to an hour, then flush with boiling water. For tougher blockages, mix ½ cup of baking soda with ½ cup of salt, pour it down the drain, and follow with a cup of boiling vinegar. Allow it to sit before flushing with boiling water.
If these methods don’t work, you may need to clean the P-trap - the curved pipe beneath your sink. Place a bucket underneath to catch water and debris, then carefully remove and clean this section. This is particularly effective for bathroom sinks, where hair and soap scum tend to accumulate.
Avoid using chemical drain cleaners for serious clogs. Many plumbers strongly advise against products like Drano, as they can damage your pipes and produce toxic fumes without resolving the underlying issue.
“Plumber here. A few things I’ve learned in my experience. Do not use Drano. Ever. As mentioned, it’s toxic, expensive and most importantly it doesn’t work and it eats at seals that prevent leaks.”
MitchsLoveSmilyFaces, Plumber
How to Prevent Future Clogs
The best way to handle clogged drains is to prevent them in the first place. Install drain covers in sinks, tubs, and showers to catch hair and small debris before they enter your pipes. Quality sink strainers cost about $10 and can save you hundreds in repair costs.
In the kitchen, never pour grease, fat, or oil down the drain. Instead, collect these substances in a container and throw them in the trash once they’ve solidified. Scrape food scraps into the garbage or compost bin rather than rinsing them down the sink, even if you have a garbage disposal.
In the bathroom, use toilet paper sparingly and flush only human waste and toilet paper. As Thames Water explains:
“Sewers are only designed to take water from toilets, sinks, baths and showers along with human waste and toilet tissue. Everything else should be put in the bin.”
Thames Water
Shake off dirt and debris before showering, and regularly clean your drains to remove mineral buildup that could lead to clogs. Also, consider the placement of trees near your home, as roots can invade underground pipes and cause major blockages.
If you’ve tried these steps but still notice slow drainage, multiple clogged fixtures, foul odors, or water backing up, it’s time to call a professional plumber. Severe blockages often require expert tools and solutions. On average, plumbers charge about $239 to clear a drain, with prices ranging from $147 to $343 depending on the severity of the blockage. While it may seem expensive, addressing the issue promptly can prevent far more costly damage down the line.
Leaking Faucets
A dripping faucet might seem like nothing more than a minor inconvenience, but it’s actually a sneaky source of water waste - and higher utility bills. That constant drip can quickly add up, making it crucial to understand why faucets leak and how to fix them before they turn into a bigger (and more expensive) problem.
Unlike burst pipes or severe clogs, leaking faucets give you some breathing room to figure out what’s wrong and make repairs. Most leaks stem from a handful of common issues, many of which you can tackle yourself with basic tools and affordable replacement parts.
Why Faucets Start Leaking
Leaking faucets usually boil down to a few culprits: worn washers, damaged O-rings, loose parts, corrosion, or high water pressure. Each issue comes with its own telltale signs, helping you pinpoint the problem.
- Worn-out washers are the top reason for leaks, especially in older compression-style faucets. These rubber or plastic discs create a seal when the faucet is off, but over time, friction and wear cause them to break down, letting water slip through.
- Damaged O-rings often lead to leaks around the base of the faucet or trouble mixing hot and cold water. These small but essential rings seal connections between components, and when they crack or shrink, water escapes.
- Loose parts, like packing nuts or adjusting rings, can also cause drips near the faucet’s base. Handles turned repeatedly over time can loosen these parts, allowing water to seep out.
- Corrosion and mineral buildup wreak havoc on the valve seat, where the faucet meets the spout. Hard water deposits and sediment can eat away at the metal, preventing a proper seal and causing persistent drips.
- High water pressure can stress faucet components, sometimes resulting in intermittent dripping. If your faucet only leaks occasionally, checking your home’s water pressure might uncover the issue.
To figure out what’s wrong, pay attention to where the leak is coming from. Drips from the spout often point to problems with the washer or valve seat, while leaks around the handle suggest an O-ring issue. Knowing your faucet type - whether it’s compression, ball, cartridge, or ceramic disc - will also guide your repair approach.
How to Fix a Leaking Faucet
While not as dramatic as a burst pipe, a leaking faucet still needs quick attention to avoid wasting water. The good news? Fixing it is usually straightforward and inexpensive. Most repairs require just a few tools and a little patience.
Here’s what you’ll need: a flathead screwdriver, Phillips head screwdriver, adjustable wrench, Teflon tape, and replacement washers or O-rings.
Follow these steps:
- Turn off the water supply. Locate the shut-off valves under the sink and turn them clockwise to close. If those valves aren’t accessible or functional, shut off your home’s main water supply and open the faucet to relieve any leftover pressure.
- Disassemble the faucet. Remove decorative covers or screws on the handle, then use the wrench to loosen and take off the packing nut. Take out the stem or cartridge that controls water flow.
- Inspect and replace parts. Check washers and O-rings for cracks, hardening, or other damage. Bring the old parts to a hardware store to ensure you get the right replacements. When installing new O-rings, applying a little petroleum jelly can help them fit snugly and last longer.
- Reassemble the faucet. Put everything back together in reverse order, being careful not to overtighten the packing nut to avoid damaging threads or new components.
- Test the faucet. Turn the water supply back on and check for leaks. If it still drips, try adjusting the packing nut or double-checking for worn parts you might have missed.
Money Lost from Water Waste
Even the smallest drip can take a toll on your wallet. A faucet dripping at just one drip per second wastes over 3,000 gallons of water per year. With the average cost of water in the U.S. at about $1.50 per 1,000 gallons, that seemingly harmless drip adds up to $4.50 annually.
But things can get worse. A faucet leaking at 120 drops per minute wastes more than 11 gallons daily, costing roughly $6 per month. At one gallon per hour, you’re looking at 24 gallons a day - or 8,640 gallons a year - potentially spiking your water bill by $70 or more each month.
The impact goes beyond your water bill. Nationwide, 10% of homes have leaks wasting 90 gallons or more per day, and the average household loses nearly 10,000 gallons annually to leaks. Fixing these issues can slash your water costs by about 10%.
Leaking faucets also pose risks to your home. Persistent moisture can damage sinks, countertops, and cabinetry, and even encourage mold growth. Repairs for water damage can be costly, especially if you need to hire a plumber, who typically charges between $45 and $200 per hour. Tackling a simple leak yourself can save you a significant amount of money.
Running Toilets
A running toilet can waste up to 100 gallons of water per hour, which could send your water bill through the roof. While it might not seem as urgent as a burst pipe, this issue can drain thousands of gallons in a short time. To put it in perspective, a continuously running toilet could waste around 2,400 gallons a day or over 6,000 gallons in a month.
Why Toilets Keep Running
The cause of a running toilet often lies within a few key components inside the tank: the flapper, fill valve, float mechanism, chain, or handle.
The flapper is the most frequent offender. This rubber piece seals the tank after each flush, but over time, it can warp, crack, or accumulate mineral deposits, preventing a proper seal. When that happens, water leaks continuously from the tank into the bowl.
“All rubber parts in the toilet will degrade over time due to chlorine in municipal water or sediment and minerals that are present in most water systems.” - The Home Depot
The flapper chain can also cause problems. If it’s too short, it might stop the flapper from sealing completely. If it’s too long, it can get stuck beneath the flapper. The fill valve, on the other hand, might fail to regulate water levels, causing the tank to overflow into the tube. Similarly, a stuck or improperly set float mechanism can trigger constant refilling. Even the handle can be to blame - if it’s corroded or stays pressed down after flushing, it could keep the flapper open longer than necessary.
Once you’ve identified these possible culprits, fixing the problem is often straightforward.
How to Stop a Running Toilet
You can usually fix a running toilet without calling a plumber by following a step-by-step approach. Start by figuring out whether the toilet runs constantly or intermittently and check for water pooling around the base.
Begin with the flapper, as it’s the most common source of trouble. Remove the tank lid and press down on the flapper. If the water stops immediately, the flapper is faulty and should be replaced.
If the flapper seems fine, move on to the fill valve. Flush the toilet and, as the tank refills, lift the float arm. If the water stops, adjust the float so the water level is about 1/2 to 1 inch below the top of the overflow tube. If the water doesn’t stop, the fill valve may need replacing.
Next, check the flapper chain. It should have just enough slack to allow the flapper to close properly - not too tight and not too loose. Cleaning the flapper and valve seat with a paper towel can also help remove debris or mineral buildup that might prevent a proper seal. Be sure the water level in the tank is about an inch below the overflow tube, adjusting the float as needed.
For silent leaks, try the food coloring test. Add a few drops of food coloring to the tank and wait a few minutes without flushing. If the color shows up in the bowl, the flapper seal is compromised and needs attention.
If none of these steps resolve the issue, it might be time to call a professional, like 24/7 Plumbers Near Me, for expert help.
What Tools You Need
Once you’ve pinpointed the issue, gather a few basic tools to make the repair. Most fixes require items you likely already have at home. Pliers are handy for adjusting chains or bending float arms, while a hacksaw might be needed to trim replacement parts.
Keep a universal flapper in your toolkit - these are designed to fit most toilet models and offer multiple mounting options. A replacement fill valve is also useful to have on hand. Other helpful items include rubber gloves for comfort, a flashlight for better visibility inside the tank, and Teflon tape to create tight seals during reassembly. A bit of petroleum jelly can also help new rubber parts fit snugly and extend their lifespan.
Ignoring a running toilet can be costly. A leak wasting 200 gallons a day could add about $30 to your monthly water bill (based on an average cost of $0.005 per gallon), which adds up to $360 annually.
“A lot of people don’t realize water is running until they get a high water bill. The first thing we tell them is to check their toilet to see if it’s running or leaving a line or a residual mark inside the bowl.”
– Steve Hutkin, Master Plumber, Advantage Plumbing & Rooter
To avoid surprises, inspect the flapper, float, and valves regularly. Toilets are the biggest source of indoor water leaks, so catching issues early can save you from wasting water - and money.
Water Heater Problems
Dealing with water heater problems can throw your daily routine into chaos - cold showers and potential water damage are no fun. Acting quickly is essential to avoid costly repairs. Just like other plumbing emergencies, addressing water heater issues promptly can limit the damage. Here’s a breakdown of common problems and the steps you should take when your water heater starts acting up.
Most Common Water Heater Problems
Water heaters can experience a range of issues, with some of the most frequent being leaks, lack of hot water, fluctuating temperatures, discolored water, and strange noises.
- Water leaks: Look for drips, pooling water, or moisture around the pipes.
- No hot water: This often means sediment buildup in the tank or a failing heating element.
- Inconsistent water temperature: If your shower keeps switching between too hot and lukewarm, the thermostat or heating element could be malfunctioning.
- Discolored water: Rusty or murky water usually points to internal corrosion inside the tank.
- Unusual noises: Sounds like popping, banging, or rumbling often indicate sediment buildup at the tank’s bottom. Low water pressure from hot water taps could also signal sediment clogging the system.
Typically, tank-style water heaters last about 8 to 12 years, while tankless models can run for 15 to 20 years or more.
First Steps for Water Heater Emergencies
When your water heater fails, quick and methodical action can help you avoid serious water damage. Before diving into repairs, follow these safety measures to protect yourself and your home.
“When your water heater leaks, quick actions can prevent further damage. You need to shut down the power, water supply, and drain the heater to avoid flooding and more costly repairs.” - Benjamin Franklin Plumbing
- Turn off the water supply: Find the shut-off valve on the cold water inlet pipe near the water heater. Turn it clockwise to stop the water flow.
- Shut off the power: If you have an electric water heater, switch off the corresponding circuit breaker. For gas units, turn the gas control valve to the “off” position.
- Contain leaks: Use buckets, towels, or a drain pan to manage any water escaping from the unit.
- Drain the water heater: Attach a garden hose to the drain valve at the bottom of the tank and direct the water outside. Open the pressure-relief valve to release built-up pressure.
- Check for hot water issues: For gas heaters, make sure the gas valve is fully open. For electric models, check that the circuit breaker hasn’t tripped. Also, ensure the thermostat is set between 120°F and 140°F.
- Clean up immediately: Use towels, mops, or a wet/dry vacuum to remove standing water and prevent further damage or mold growth.
Safety Rules for Water Heater Repairs
Water heater repairs often involve working with water, electricity, and gas, so safety should always come first.
- Avoid electrical hazards: Never work on electrical components if there’s water present to reduce the risk of electrocution.
- Ensure proper ventilation: If you’re dealing with a gas water heater, make sure the area is well ventilated to prevent gas buildup.
- Wear protective gear: Rubber gloves and boots can protect you when dealing with leaks.
- Know when to call a professional: If your water heater has severe corrosion or the tank is leaking, it’s likely time for a replacement. Similarly, if you’re not comfortable handling gas connections or notice a gas odor, stop immediately and call an expert.
If temporary fixes don’t work, or if you’re facing major leaks or feel uncertain about repairs, calling in professionals like 24/7 Plumbers Near Me can make all the difference.
“The key to minimizing water damage is early detection, proactive maintenance, and swift action when leaks occur.” - Austin Hi-Tech Restoration
Water heater emergencies often strike at inconvenient times. Having access to professional help ensures you can address issues promptly, preventing minor problems from becoming major disasters.
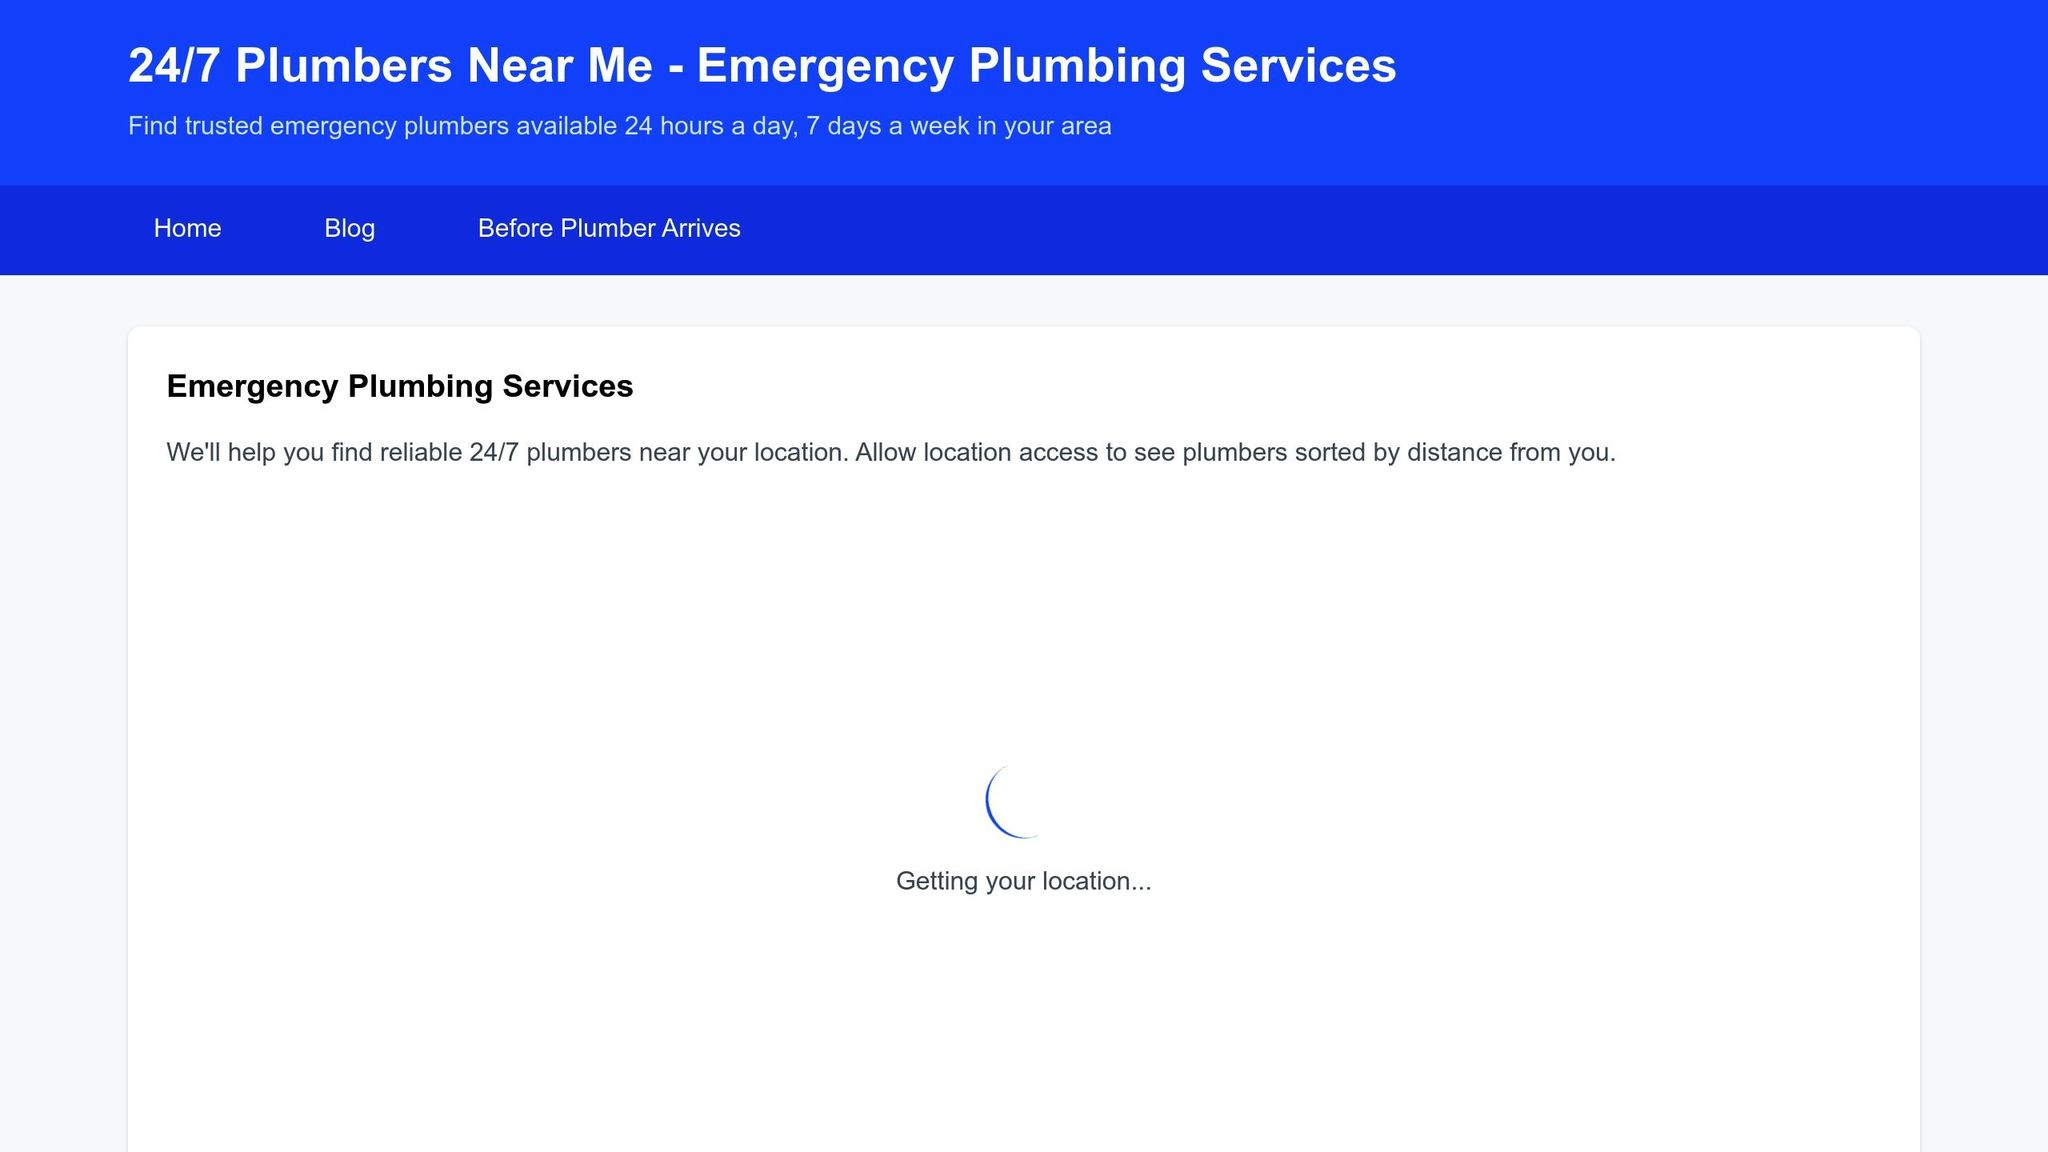
When to Call 24/7 Plumbers Near Me
Plumbing problems like burst pipes, clogs, leaks, or water heater malfunctions can escalate quickly, making it essential to know when to call in professionals. While minor issues might be manageable with DIY fixes, there are times when expert intervention is not just helpful - it’s necessary. Certain situations demand specialized tools, knowledge, and immediate action to prevent costly damage.
If you’re dealing with major issues like main sewer line blockages, water line disruptions, or gas line problems, it’s time to stop any DIY efforts and call a professional immediately. For example, multiple backed-up drains often point to a main sewer blockage that requires professional-grade equipment to resolve. Similarly, if your toilet starts gurgling when you shower, this could indicate a sewer line blockage that risks causing severe backups.
Water damage is another red flag. If you spot water stains or damp patches on walls or ceilings, it’s crucial to act fast. What might look like a minor leak could be masking a larger issue that only a professional can properly diagnose and repair. Attempting complex fixes without the right skills can lead to more damage, higher costs, and even safety risks.
Some problems that require immediate professional attention include:
- Pipe leaks or burst pipes
- Sewer line blockages
- Persistent low water pressure
- Water heater malfunctions
- Any issues involving gas lines
Gas line repairs, in particular, should never be attempted without proper training and equipment due to safety hazards.
Emergency plumbing services typically cost between $100 and $500 per visit, with an average hourly rate of $170. These rates are often 1.5 to 3 times higher than standard fees. However, the cost is a small price to pay to avoid the potential for more extensive damage.
Services like 24/7 Plumbers Near Me can connect you with licensed, bonded, and insured plumbers across the country. These professionals are often available to respond within 30 minutes to 2 hours, ensuring you get the help you need quickly. The directory also sorts plumbers by proximity, so you can find someone local for the fastest response.
When reaching out to an emergency plumber, be ready to explain the problem in detail. Share specifics about the issue, its location in your home, and whether you’ve already shut off the water supply. This preparation helps ensure the plumber arrives equipped with the right tools and knowledge to address the problem effectively.
Professional plumbers focus on solving the root causes of plumbing issues, providing long-term solutions rather than temporary fixes. While DIY repairs may seem convenient, relying on experts can save you from recurring problems and even greater expenses in the future.
Conclusion
Plumbing emergencies like burst pipes, clogged drains, leaking faucets, running toilets, and water heater failures often strike without warning. Acting fast can help you avoid costly water damage. For instance, a ¾-inch pipe can release up to 110 gallons of water per minute, which highlights just how critical quick action is.
Start by identifying and labeling your main water shutoff valve, individual shutoff valves, and electrical breaker panel. Keep an emergency kit handy with essentials like hose caps, push-to-connect fittings, threaded caps, and plugs. These simple preparations can stop minor problems from escalating into major disasters.
“The key to minimizing water damage is quick action.” - This Old House
Beyond emergency fixes, regular maintenance plays a huge role in protecting your home from future issues. Inspect visible pipes, fixtures, and supply valves every quarter for signs of wear or leaks. Test your toilet and sink shutoff valves every three months, and check your water heater’s pressure relief valve at least twice a year. Fix small leaks as soon as you spot them, insulate pipes in unheated spaces, use drain screens, avoid flushing anything nonbiodegradable, and clean faucet filters and screens regularly to ensure steady water flow and pressure.
FAQs
How can I prevent common plumbing emergencies like burst pipes or clogged drains?
To help prevent burst pipes during the colder months, make sure to insulate your pipes and check them regularly for any signs of leaks, cracks, or weak areas. For clogged drains, a simple monthly routine can help: flush them with hot water and baking soda and steer clear of pouring things like grease, coffee grounds, or large food scraps down the drain.
You can also keep your plumbing running smoothly by cleaning faucet aerators, keeping an eye on water pressure, and scheduling routine maintenance. These straightforward habits can save you from dealing with expensive plumbing issues down the road.
How do I know if I should call a plumber or handle a plumbing issue myself?
Deciding whether to handle a plumbing issue yourself or call in a professional largely depends on how serious or complicated the situation is. Simple problems like a dripping faucet, a slow-draining sink, or a toilet that won’t stop running can often be fixed with basic tools and a little know-how.
On the other hand, more serious issues - like burst pipes, water heater troubles, or leaks that won’t go away no matter what you try - are better left to a licensed plumber. These kinds of problems can cause major damage if not addressed properly and promptly.
If you’re unsure, it’s usually wiser to reach out to an expert. It might save you from dealing with even bigger (and more expensive) headaches later.
What tools and supplies should I keep at home for common plumbing emergencies?
To be prepared for common plumbing emergencies, it’s smart to keep a basic plumbing kit within reach. Some must-have tools include a plunger to clear clogs, an adjustable wrench for tightening or loosening fittings, a pipe wrench for working on larger pipes, and a basin wrench to handle those tricky, hard-to-reach spots. A hacksaw is also handy for cutting through pipes when necessary.
On the materials side, stock up on Teflon tape (also known as plumber’s tape) to seal threaded connections, pipe sealant to manage leaks, and a few rubber washers for quick faucet fixes. With these essentials on hand, you can tackle minor problems like leaks or clogs and minimize damage while waiting for a professional plumber to step in.