Emergency Plumbing Checklist for Homeowners
TLDR; Plumbing emergencies include sudden leaks, burst pipes, overflows, or water damage that can’t wait, and knowing the difference between urgent and non-urgent issues helps you act fast. The first few minutes matter most: shut off the water, contain damage, and call a reliable 24/7 plumber, understanding that emergency service costs more due to after-hours labor and rapid response. Homeowners should choose an emergency plumber in advance, keep a simple checklist handy, and avoid risky DIY fixes beyond temporary containment. Preventive maintenance, knowing insurance coverage, and understanding renter vs. owner responsibilities can significantly reduce stress, damage, and costs when water hits the floor.
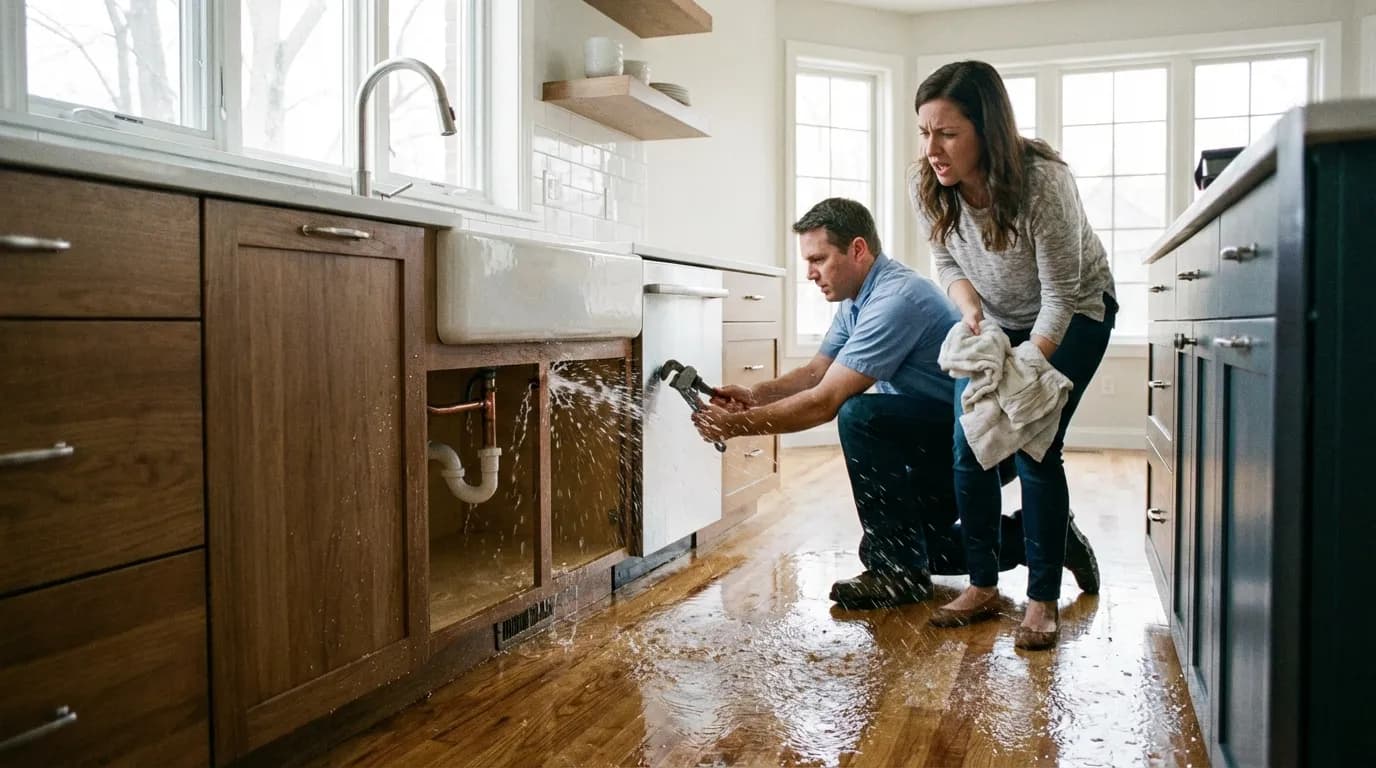
Plumbing emergencies never show up at a good time. It’s usually late at night when a pipe bursts, or right before guests arrive and the toilet overflows, which is about as bad as timing gets. Other times it’s quieter but just as stressful, like water suddenly collecting under the sink with no warning. Moments like these can cause panic fast. Most homeowners immediately search for an “emergency plumber near me” or a “24/7 plumber,” and that reaction is understandable. When water is spreading across floors or soaking into walls, every minute matters more than people think. Repair costs often climb the longer the problem sits. And honestly, one rushed or poorly chosen decision can turn a bad situation into a much bigger mess.
The most helpful part of this guide is that it helps you slow down mentally while still taking the right steps, which isn’t easy during an emergency. Instead of guessing, you’re given a clear plumbing emergency checklist that’s simple to follow, even when stress is high. The steps are short and direct. You’ll learn what actually counts as a plumbing emergency and what to do in the first five minutes before help arrives. That may include shutting off the main water valve or turning off power if water is near electrical outlets. It also explains when calling a 24/7 plumbing service makes more sense than trying a quick DIY fix that often causes more damage. Along the way, the guide also covers prevention tips, common emergency repair costs, and easy ways to prepare ahead of time.
Plumbing emergencies happen more often than many people expect. Surveys show that over 80 percent of homeowners deal with at least one repair emergency each year, with plumbing issues near the top of the list. Older homes play a role, higher water pressure adds stress, and aging pipes increase the risk even more in 2026, especially in houses that haven’t been updated. Having a plan isn’t really optional anymore. It’s just part of taking care of your home.
What Counts as a Real Plumbing Emergency (and When to Call an Emergency Plumber Near Me)
Not every drip or slow drain needs an emergency call. Some problems can usually wait for a normal appointment, and that’s often just fine. Others really can’t wait. Knowing the difference helps homeowners stay calm, protect the house, and keep costs in check, which most people want. There’s no need to panic here. Just think it through.
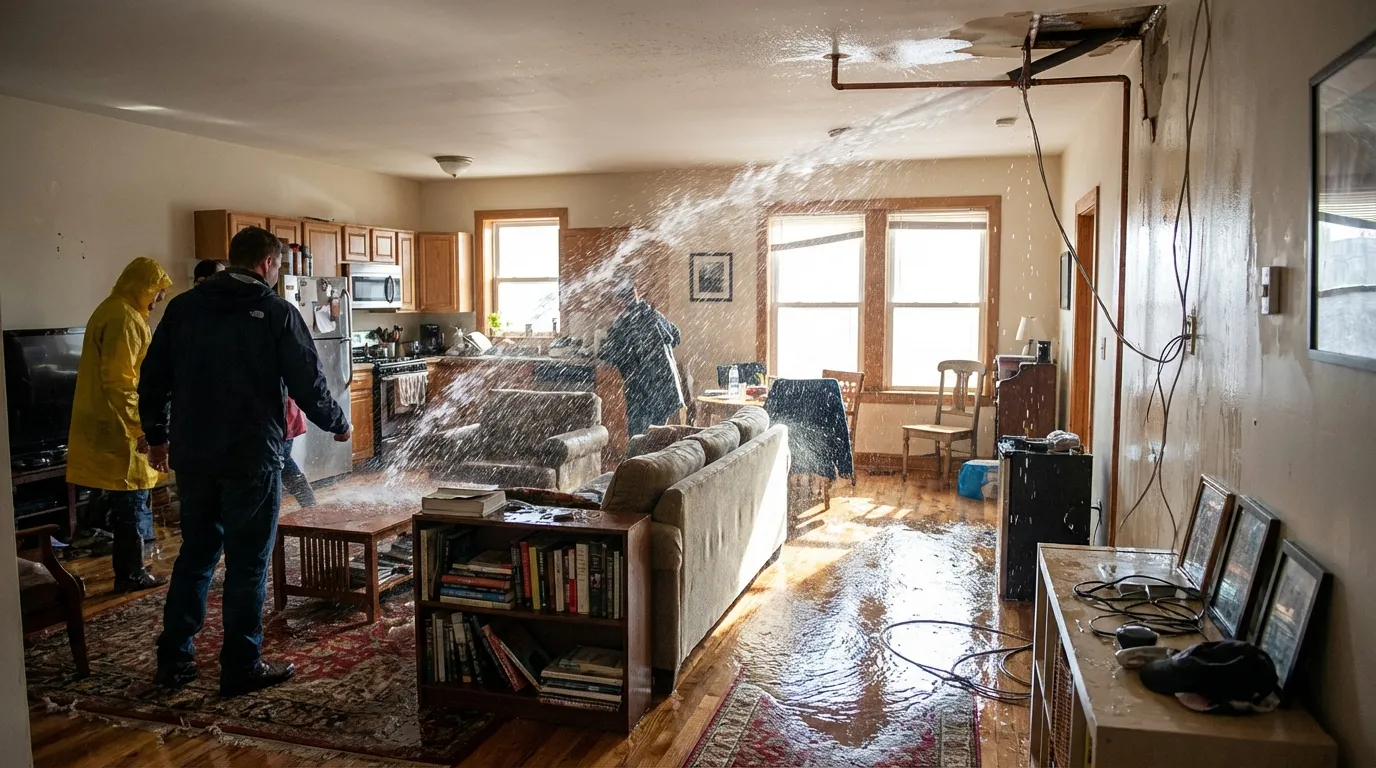
A real plumbing emergency is any issue that puts the home at immediate risk of flooding, damage, health problems, or a complete loss of water. Burst pipes are usually the easiest to spot. They can release gallons of water in minutes, soaking floors and walls and sometimes reaching electrical areas, where things can get serious fast. Damage stacks up quickly in these cases. Sewer backups also need quick action. They push dirty water into living areas and make bathrooms unsafe right away, which is not something you can ignore for a day or two.
Overflowing toilets that won’t stop also count as emergencies, especially when they show up with other warning signs like gas smells near a water heater or a sudden drop in water pressure across the house. In colder weather, frozen pipes that start to crack or leak need immediate help too. Small leaks rarely stay small. They often turn into full breaks soon after, often when no one is home to notice.
Some emergencies are quieter. A water heater that’s leaking or failing can slowly flood a basement and ruin stored boxes, furniture, or tools, sometimes before anyone realizes what’s happening. A ceiling stain that suddenly spreads often points to a hidden pipe problem above the drywall. In multi-story homes or condos, leaks don’t stay in one place. Water often moves into nearby units, raising repair bills and possible legal trouble. When water is going where it shouldn’t, or sanitation is at risk, acting fast is usually the safer choice.
Many homeowners hesitate, hoping the issue will go away on its own. That delay often causes more trouble. As water damage spreads, repair costs climb fast. Industry data shows emergency repairs can cost 1.5 to 2 times more once damage grows. Calling early limits what needs fixing and lowers long-term risk. In most cases, that simple decision really helps.
According to a 2025 HomeServe survey, plumbing is the number one emergency concern for homeowners. Toilets alone make up more than a quarter of urgent calls. A very common issue.
| Plumbing Issue | Share of Emergency Calls |
|---|---|
| Clogged or overflowing toilet | 26% |
| Burst or leaking pipes | 23% |
| Water heater failure | 12% |
| Sewer backup | 9% |
For more context, you can read 7 Signs You Need Emergency Plumber Right Now for additional early warning indicators.
First Five Minutes: What to Do Right Away
Those first few minutes after a plumbing emergency often shape how the rest of the situation goes. The choices you make right away can protect your home and help keep repair costs from jumping fast. These moments are stressful (your heart’s probably racing, I know), and quick, sensible decisions usually matter more than getting everything perfect.
The biggest priority is water control. Shutting off the main water supply as soon as possible limits how much damage can spread. Every homeowner should know where that shut-off valve is before anything goes wrong, even though it’s an easy detail to put off. It’s often near the water meter, along a basement wall, or sometimes outside by the foundation. If the problem is limited to one fixture, like a sink or toilet, the local shut-off valve is usually the faster and cleaner choice because it stops water right at that spot.
Now think about electricity. If water is close to outlets, appliances, or wiring, turning off power to those areas is the safer option. This step can feel uncomfortable, but it’s needed. Water and electricity don’t mix, and personal safety matters more than cabinets or flooring.
Another useful step is relieving pressure in the plumbing system. Opening a few faucets lets trapped water drain out, which can slow leaks and ease stress on weak pipes. It’s a simple move that often makes a real difference.
If it’s safe to do so, move furniture, rugs, and valuables away from wet areas. Even sliding plastic or foil under furniture legs can help prevent stains or warping. Buckets under drips won’t solve the problem, but they can limit how far water spreads.
Once things settle down, take photos or short videos for insurance. This usually works best after the leak is under control, not while water is still pouring out.
From there, searching “plumbing emergency near me” or calling a 24/7 service makes sense. Speed matters because damage builds minute by minute. Reviews and proper licensing tend to say more than flashy ads. You can also compare advice from the Complete Guide to Finding Local Emergency Plumber for deeper insights.
If you’re unsure whether it’s truly urgent, btw, this guide helps: signs you need an emergency plumber right now.
Why Emergency Plumbing Costs More and What to Expect
Many homeowners pause before calling a 24/7 plumber, mainly because the price can feel unpredictable. That unknown often causes more stress than the leak itself. Knowing how emergency pricing usually works ahead of time can make the decision clearer and, honestly, a bit calmer, which helps when water is already causing trouble.
What makes emergency plumbing cost more isn’t hard to understand. The work happens after hours, technicians are sent out right away, and repairs often turn out to be more involved once everything is opened up. In 2026, an emergency plumbing visit usually runs between $350 and $600. Bigger problems, like burst pipes or sewer backups, can push costs higher, depending on how much damage has already happened. These situations add up fast, especially when water has been flowing unchecked.
For comparison, standard plumbing repairs often fall between $250 and $1,000. Emergency surcharges commonly add around 50 to 100 percent. It helps to see these numbers as context rather than a warning, they’re meant to explain the price gap, not scare anyone.
A few practical details shape the final bill. Access often matters more than people expect. Jobs that involve walls, floors, or tight crawl spaces take longer and may need special tools. The age of the plumbing also matters, since older galvanized or cast-iron systems usually need extra time and parts. Some emergencies even require restoration teams for drying or mold prevention, which adds steps and cost.
Waiting to call often leads to higher bills. Water damage spreads quickly, mold can form, and materials weaken. EPA data shows U.S. homes lose over 900 billion gallons of water each year from leaks. Small issues rarely stay small, so timing matters more than most people think.
For homeowners, it is a warning that the cost of plumbing services will continue to rise as demand increases and the number of skilled professionals shrinks.
Setting aside an emergency plumbing fund of $500 to $1,000 is now seen as a practical step for many households. A little preparation really does help.
Choosing the Right 24/7 Plumber Under Pressure (How to Find an Emergency Plumber Near Me)
The hardest part is often making a clear choice when water is already spreading and nerves are shot. These moments usually come out of nowhere, and most people are focused on stopping the damage, not weighing every option. Still, rushing the decision can lead to bigger headaches later on.
A dependable emergency plumber near me is usually licensed and insured, but that’s only the starting point. What matters just as much is whether someone actually picks up the phone at 2 a.m., rather than only saying they do. The most helpful companies make their contact details easy to find and clearly serve your area, not a location two cities away. Reviews are more useful when they talk about late-night or weekend calls. Unclear pricing or dodging even a rough estimate often points to small problems that pile up fast.
So what should you ask right away? A good first step is to ask about availability and realistic wait times. It also helps to check that they handle your exact issue, like a burst pipe or sewer backup, and to ask about call-out fees if that affects your choice. Straight answers tend to calm things down.
Checking bonding and workers’ compensation insurance is also important. That coverage protects you if something goes wrong during the repair. Local plumbers often get there faster and know local codes better, while national call centers can slow things down and vary in quality.
Being prepared makes this much easier. Saving a trusted 24/7 plumbing number ahead of time can spare you a frantic search later. For a deeper breakdown, this guide explains more: Best Emergency Plumbers: What to Look For.
The ongoing housing shortage, paired with the fact that the average home in the U.S. is now more than 40 years old, will prompt homeowners to address problems in their current homes.
Older homes often need faster response times and plumbers with real hands-on experience, especially when a pipe fails suddenly in the middle of the night.
Emergency Plumbing Checklist You Can Save
This checklist keeps things simple. Save it on your phone or print it out so it’s nearby when a leak or burst pipe happens, which is usually when stress kicks in. Having it ready means less rushing around when it’s harder to think clearly.
- Shut off the main water valve as soon as you can
- If there’s standing water, it’s often safer to turn off nearby electricity at the breaker (don’t guess)
- Open a few faucets to let pressure out of the system
- Use what’s close by: towels, buckets, or containers can slow or catch spreading water
- Take a couple of quick photos for insurance and records; your phone works fine
- Call a plumbing service that offers 24/7 emergency support
- Keep kids, family members, and pets away from the area
Many people add personal notes to this list. Writing down the exact shut-off location, a plumber’s number, or an insurance policy detail can save time and help prevent mistakes. Sharing this with other adults at home helps too, especially if someone else needs to act fast.
Major repairs aren’t a DIY job. Quick patches may seem tempting, but they usually don’t last. Tape, sealants, or clamps won’t fix burst pipes or sewer lines, and that’s when damage can get worse.
Prevention Steps That Reduce Emergency Risk
Most emergencies usually give off small hints before they turn into bigger problems. When people catch those early signs, they often save money and avoid a lot of stress. It rarely starts in an obvious way, just small details that are easy to brush off.
Common clues include slow drains, low water pressure, rust‑tinted water in sinks, or pipes that knock or whistle. As odd as they sound, these signs often point to issues that keep getting worse when ignored. In older homes, inspections every one to two years help spot trouble early, especially near kitchens and basements, even though many homeowners wait longer than they should.
Newer tools can also help. Smart leak detectors are popular in 2026 and are usually easier to use than expected. They send phone alerts when leaks start, and some models can shut off the water automatically. This works well for rentals or vacation homes, where leaks often go unnoticed.
Routine maintenance also matters in very practical ways. Flushing a water heater once a year helps stop sediment buildup and overheating. Replacing toilet and washing machine supply lines every five to seven years lowers the chance of sudden breaks, like a burst line at midnight. According to the EPA, fixing household leaks can save nearly 9,400 gallons of water per home each year (EPA WaterSense).
Renters and Emergency Plumbing Responsibilities (Finding an Emergency Plumber Near Me as a Tenant)
Even when someone rents, plumbing emergencies still happen, it’s often just part of an aging building. Knowing what the tenant is responsible for can help. Most leases say problems must be reported right away, and that usually isn’t optional. Waiting often makes damage worse and can raise costs. In these situations, acting fast often matters more than getting the timing exactly right.
One helpful thing to figure out early is the shut‑off valve. You don’t own the place, but knowing where it is can reduce damage when something breaks. Before any trouble starts, take time to find it. Then reach out to the landlord or the emergency maintenance line as soon as you can. Keeping notes can help, since details are easy to forget later.
It also helps to know which repairs tenants are allowed to approve on their own. Many landlords want written permission before an outside plumber is called, unless there’s a real risk to safety or the property. Saving messages and photos often makes disagreements easier to sort out, for example, if a water heater starts leaking or sewage smells appear.
Video: Seeing Emergency Response in Action
Sometimes watching beats reading in moments like this, so the video shows how professional plumbers handle urgent calls in real homes, not staged sets. These are real situations in spaces you probably recognize. Seeing emergency responses helps homeowners see what looks normal and what doesn’t at the time. You’ll see how plumbers assess damage, trace the source, and act fast to stop water before larger repairs begin. This context can calm nerves and make talks go smoother when the plumber arrives.
Common Questions (FAQ)
Is a dripping pipe an emergency?
A slow drip usually isn’t urgent at first, and that’s pretty common. But over time it can turn into a bigger problem, especially if it won’t stop at the shut-off valve or the dripping gets worse, then it’s time to call a plumber. Drips inside walls or ceilings are more serious, since damage may already be there.
How fast should a 24/7 plumber arrive?
Response times vary by location, so there’s no single rule. Many emergency plumbers aim for 60, 90 minutes. In cities, they often arrive faster when traffic allows and demand is high, while rural areas usually take longer, and delays can happen.
Can I use DIY fixes until help arrives?
Big repairs can be risky under pressure, and quick fixes often fail. They can even void insurance if damage gets worse. So can you slow the water down? That usually helps, temporary steps only, just to buy time.
Does homeowners insurance cover emergency plumbing?
And many policies cover sudden damage, like burst pipes, which happens a lot. That’s helpful to know. Still, neglect and slow leaks are often excluded, so it helps to check exclusions and deductibles early.
Should I have a plumber picked out before an emergency?
Yes, saving a trusted emergency plumber in your phone means less stress, quicker help, and fewer sketchy providers, which can save time when it really counts.
The Bottom Line: Be Ready Before Water Hits the Floor
Plumbing emergencies are stressful, but they don’t have to turn into chaos. A little preparation can shift panic into action, or at least help you stay clear-headed when things get messy. When you already know what to do and who to call, it’s easier to protect your home and make smart choices instead of running around guessing. That calm makes a real difference in the moment.
The first step is usually simple: stop the water. Cutting off the flow limits damage right away. As you move through the space, safety matters too, because wet floors can become slippery fast. Calling a trusted 24/7 plumber early can help, especially if water is spreading to other rooms. Risky DIY fixes often backfire and end up costing more.
Being ready also means checking your plumbing now and then, replacing old parts, and making sure everyone in the household knows the plan, even kids in basic terms. Emergencies don’t give warnings. Homes are getting older, demand is rising, and costs keep going up. If you ever search for a “plumbing emergency near me,” you’ll already know the next step, like shutting off the valve before water reaches the hallway carpet.