How to Prepare Plumbing for Winter
Frozen pipes and water damage can wreak havoc on your home during the winter months. Preparing your plumbing ahead of time can save you from costly repairs and major headaches. Here’s how you can protect your pipes and water systems from freezing temperatures:
- Identify vulnerable areas: Check outdoor water lines, unheated spaces like basements and attics, and pipes along exterior walls.
- Locate shutoff valves: Test your main water valve and individual shutoff valves for outdoor fixtures.
- Fix leaks: Inspect for drips under sinks, around toilets, and near water heaters. Address small leaks with Teflon tape or repair clamps.
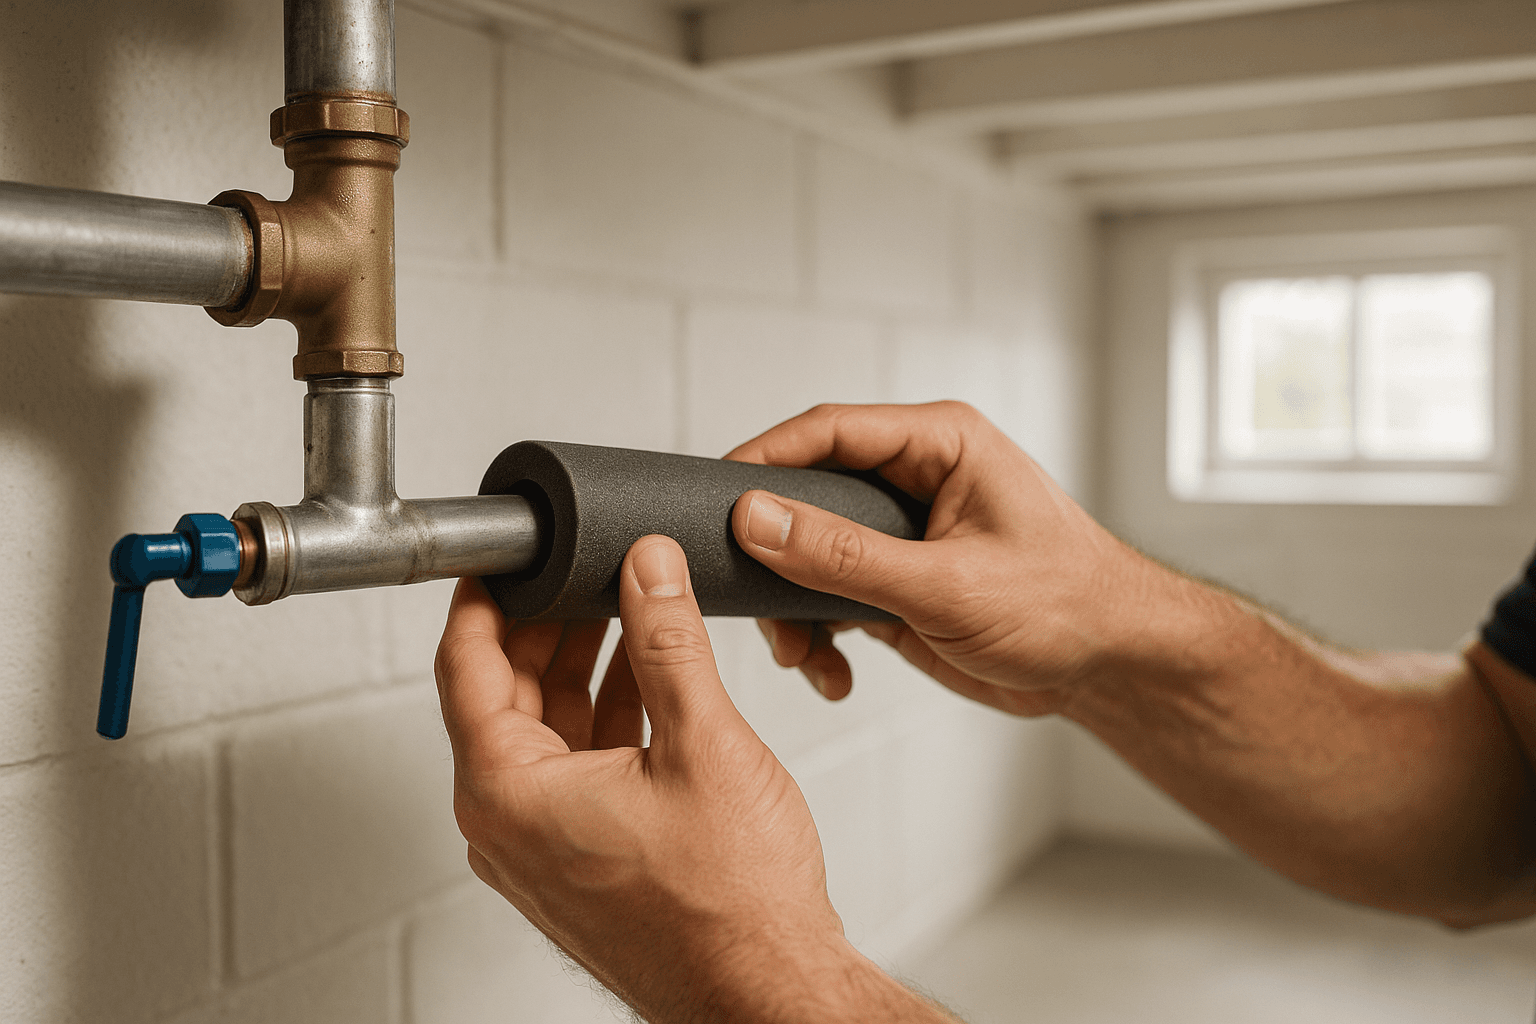
- Insulate pipes: Use foam pipe sleeves for exposed pipes and heat cables for extra protection in unheated areas.
- Protect outdoor fixtures: Drain faucets, disconnect garden hoses, and install foam faucet covers. Winterize sprinkler systems by draining or using compressed air.
- Monitor during winter: Use smart water monitors and temperature sensors to catch issues early.
12 TRICKS To WINTERIZE Your Plumbing! (Easy DIY) | GOT2LEARN
Step 1: Find Risk Areas and Water Shutoff Valves
Getting ready for winter starts with identifying where your plumbing is most at risk and knowing exactly where to find your shutoff valves. This simple prep work can save you from costly repairs and headaches when temperatures drop.
Find Areas Where Pipes Freeze Most
Begin by checking outdoor water lines, such as hose bibs, swimming pool supply lines, and sprinkler system pipes. These are the first to freeze since they’re directly exposed to the cold.
Inside your home, focus on unheated spaces like basements, crawl spaces, attics, and garages. These areas often lack proper heating and can reach freezing temperatures quickly during a cold snap. Pay special attention to pipes running along exterior walls, as they’re only separated from the cold by a thin layer of insulation - or sometimes none at all. Don’t forget to inspect under kitchen and bathroom sinks, especially if the pipes are against exterior walls. Open the cabinet doors and feel if the pipes are unusually cold.
Another critical spot is where your main water line enters the house through the foundation. This area is often unheated and may have small gaps that let in cold air, making the pipes there particularly vulnerable.
Keep an eye out for early warning signs of freezing pipes: reduced water flow, strange noises like gurgling or banging, visible frost on exposed pipes, or unusual odors coming from your drains. These clues can help you pinpoint trouble spots before they become bigger issues.
Once you’ve identified the risk areas, the next step is to locate and test your shutoff valves.
Locate and Test Your Shutoff Valves
After pinpointing vulnerable pipes, it’s crucial to know how to shut off the water quickly in case of an emergency. Start by finding your main water shutoff valve. It’s usually located where the water service line enters your home - commonly in the basement, crawl space, or near the water meter.
The valve will either be a wheel (gate valve) or a lever (ball valve). Test it by turning it clockwise to close and counterclockwise to open. If it’s hard to turn, apply some penetrating oil and gently work the valve until it moves smoothly.
Next, locate individual shutoff valves for outdoor spigots and hose bibs. These are typically found inside your home, in a basement or utility room. Mark their locations with tape or tags, and consider creating a simple map to keep near your main electrical panel for quick reference.
Test these valves by shutting them off and then checking the corresponding outdoor spigots. Open the spigot - if no water comes out, the valve is working. If water still flows, the valve may need repair or replacement before freezing weather arrives.
For homes with sprinkler systems, find the main irrigation shutoff valve. This is usually near the water meter or where the irrigation line branches off from your main water service.
If any valve is broken, stiff, or missing entirely, it’s best to call a professional plumber. Having functional shutoff valves is essential to minimize water damage if pipes freeze and burst during the winter.
Step 2: Fix Leaks and Get Ready for Cold Weather
When temperatures drop, even small leaks can turn into big problems. Freezing water expands, putting extra pressure on pipes that are already weak. Taking care of leaks now can save you from the headache - and expense - of burst pipes and water damage later on.
Check for Leaks
Start by inspecting areas where leaks are most common - under sinks, around toilets, and near water heaters. Look for puddles, water stains, or damp spots on floors and walls.
Take a close look at pipe joints and connections for mineral deposits, rust, or corrosion. These buildups - often white, green, or orange - can signal slow leaks that have been happening over time. Run your hand along exposed pipes to check for hidden moisture.
Changes in your water pressure or flow can also hint at leaks. If your faucets seem weaker or you hear gurgling sounds, it’s worth investigating. A sudden spike in your water bill without an obvious reason could be another clue.
Don’t forget to examine pipe insulation and wrapping. If the insulation feels wet or shows water stains, remove it to check for cracks, pinholes, or loose fittings that might fail when the cold weather hits.
For a more detailed check, turn off all water-using appliances and faucets. Then, watch your water meter. If the dial keeps moving after 10–15 minutes, you probably have a hidden leak. The sooner you catch it, the better.
Once you identify leaks, fix them right away to avoid further damage.
Fix Small Problems
Small leaks and loose fittings are often easy to handle on your own, and fixing them now can help protect your plumbing system from winter’s stress. For leaks at threaded pipe joints, Teflon tape is your go-to solution. Wrap the tape clockwise around the threads 3–4 times, ensuring full coverage. This creates a watertight seal when you reconnect the joint.
If you have a loose faucet packing nut or valve handle, try tightening it with a wrench. Be careful not to overdo it - over-tightening can crack the nut or damage the valve, creating a bigger issue.
For pinhole leaks, you can use pipe repair clamps or rubber patches designed for quick fixes. Clean the pipe surface first, follow the instructions on the patch, and secure it tightly.
If you’re dealing with multiple or more serious leaks, it’s a good idea to call in the pros. You can reach out to 24/7 Plumbers Near Me before the freezing weather sets in.
Timing is key for professional repairs. Plumbers often get overwhelmed with emergency calls once the cold hits, so scheduling work in early fall is smart. This gives them time to do a thorough job and ensures everything is ready before winter arrives.
Step 3: Insulate and Protect Your Pipes
To keep your pipes safe from freezing - and the potential damage that comes with it - insulation is key. When water freezes, it expands by about 9%, which can lead to cracks in copper or PVC pipes. Focus on insulating pipes in unheated indoor spaces and those running along exterior walls. Here's how you can effectively insulate and protect your pipes.
Install Pipe Insulation
Foam pipe sleeves are a go-to solution for DIY insulation. They’re inexpensive, simple to install, and work well to prevent freezing, even in temperatures as low as 20°F. At just $1–$3 per 6-foot section, they’re a cost-effective way to safeguard your plumbing.
Start by measuring your pipes - common sizes are ½-inch, ¾-inch, or 1-inch. Wrap the pipes with foam sleeves, ensuring the slit faces downward to reduce moisture buildup. For corners or joints, cut the foam at a 45-degree angle so the pieces fit snugly without leaving gaps. Even small exposed sections can become weak points where freezing might occur.
Secure the foam sleeves with tape, overlapping each seam by about half an inch. Pay close attention to where the sleeves meet - leaving even a tiny gap can let cold air seep in.
For pipes in unheated areas like basements or crawl spaces, consider adding heat cables or heat tape. These cost $2–$4 per foot and should be spiraled around pipes at 6–12-inch intervals, ensuring they don’t overlap. Self-regulating heat cables are especially handy because they adjust their temperature automatically, using more power when it’s colder and less when it’s warmer. Once the heat cables are in place, cover the pipes with insulation for an added layer of protection.
Protect Outdoor Faucets and Valves
After insulating your indoor pipes, it’s time to turn your attention to outdoor fixtures, which are especially vulnerable to freezing. Outdoor faucets and hose bibs are directly exposed to cold air, and the pipes behind them often run through unheated spaces inside your walls.
Foam faucet covers are an affordable and effective solution. These dome-shaped covers cost $3–$8 each and slip over outdoor spigots like a cap. Opt for covers with drawstrings or elastic bands to create a tight seal - loose covers allow cold air to circulate, defeating the purpose.
Before installing these covers, make sure your outdoor faucets are completely drained. Turn off the water supply to each faucet from inside your house, then open the outdoor valve to let out any remaining water. Even a small amount of trapped water can freeze and cause the faucet to crack.
For shut-off valves located on exterior walls, wrap them with foam pipe insulation just as you did with your indoor pipes. These valves often sit in uninsulated spaces between wall studs, making them prone to freezing. If you have access to the area from inside your home, adding fiberglass batt insulation between the valve and the exterior wall can provide extra protection.
Don’t forget about pool and spa equipment. Insulate exposed pipes and cover pumps and filter housings to keep them safe from freezing temperatures.
Lastly, check outdoor water meters and backflow preventers. Many water utilities require customers to protect these devices. Wrap them with pipe insulation and, if allowed, cover them with an insulated meter box. Be sure to check with your water company first, as some have specific guidelines for protecting these components.
Step 4: Drain and Shut Down Outdoor Water Systems
After insulating your pipes and safeguarding outdoor faucets, it's time to turn your attention to outdoor water systems. Garden hoses, sprinkler systems, and other exterior water features require proper preparation to avoid damage from freezing water. Here’s how to handle them.
Remove and Store Garden Hoses
Garden hoses are particularly vulnerable to freezing temperatures. Any water left inside can freeze, expand, and lead to cracking.
Start by disconnecting all garden hoses from outdoor faucets, even if the faucets are labeled as frost-resistant. Water trapped at the connection point can freeze, potentially damaging both the hose fitting and the faucet.
To drain the hose, lift one end and work your way down its length to push out any remaining water. Shake it to remove any trapped droplets. Detach spray nozzles or attachments and drain them separately, as they often have small chambers where water can accumulate and freeze. Store these components indoors.
Once drained, loosely coil the hoses and store them off the ground to prevent moisture damage. If you don’t have indoor storage space, consider using a waterproof deck box to shield them from freezing temperatures and UV exposure.
Soaker hoses and drip irrigation lines need extra care. Disconnect them from their water sources, drain them thoroughly, and store them in loose coils. Their porous materials are especially prone to damage from freezing water.
Now, let’s move on to preparing your sprinkler system.
Winterize Sprinkler Systems
Sprinkler systems are a major investment, so protecting them from freeze damage is crucial. Water left in underground pipes, valves, or sprinkler heads can freeze and expand, potentially causing cracks and costly repairs.
If your system has manual drain valves, start by shutting off the water supply at the main valve, usually located near your water meter or where the irrigation line branches off. Disable the automatic timer or controller to ensure the system doesn’t accidentally activate while draining.
Open all manual drain valves, typically found at the lowest points in the system where water tends to collect. Some valves may require a small tool to operate. Once drained, cycle through each zone to clear out any remaining water.
For systems without manual drain valves, use the compressed air blowout method. This involves an air compressor that matches the manufacturer’s guidelines for your sprinkler system. Begin with the zone farthest from the compressor and continue until only air, with no water, is expelled from the sprinkler heads. Always follow the manufacturer’s instructions to avoid damaging the system’s pipes or components.
Don’t forget to protect the backflow preventer, one of the more expensive parts of your sprinkler system. Wrap it with pipe insulation and cover it with an insulated cover for added protection. If your controller has a rain sensor, drain it as well. These sensors often have small chambers that can collect water, which may freeze and cause damage. Most rain sensors include a drain plug or can be tilted to empty fully.
Finally, shut off power to the irrigation controller or set it to "rain" or "off" mode. This prevents the system from accidentally activating during brief warm spells over the winter.
Step 5: Monitor and Handle Winter Plumbing Emergencies
Even with proper insulation and sealed leaks, being prepared for emergencies is crucial. Winter weather can still wreak havoc on your plumbing system. The secret to avoiding hefty repair bills lies in staying vigilant and knowing how to act quickly when issues arise. Each year, over 250,000 U.S. families deal with frozen or burst pipes. State Farm reports show nearly 9,000 frozen pipe claims, totaling over $181 million, with the average claim surpassing $20,000.
Keep an Eye on Your Plumbing During Cold Weather
Smart water monitors can be lifesavers during the winter months. These devices attach to your main water supply and track pressure changes, freezing temperatures, and leaks. They send real-time alerts through text messages or app notifications. If something unusual is detected, many systems automatically shut off your water supply to prevent further damage. With options ranging from basic to advanced, there’s something for every budget. Considering that 40% of homeowners have dealt with damage from leaking pipes, this investment can quickly pay for itself.
Temperature monitoring systems, like those from Sensaphone, are another great tool. These systems notify you when temperatures drop, making them perfect for unoccupied homes or vacation properties. Standalone temperature sensors placed near vulnerable pipes - like those in basements, crawlspaces, or along exterior walls - can trigger app alerts or alarms before freezing occurs. Leak detectors installed under sinks, in crawlspaces, or utility closets offer early warnings, allowing you to shut off water before leaks cause significant damage.
During extreme cold, adjust your smart thermostat to keep the colder areas of your home - like basements - above 60°F. Satellite sensors can monitor these areas and prompt your thermostat to add extra heat when necessary, protecting hidden pipes while maintaining energy efficiency.
For pipes in particularly risky spots, temp-sensing heat tape is a smart solution. These heating cables wrap around pipes and activate when temperatures drop, turning on only when needed to prevent freezing. While monitoring systems are essential, you also need to be ready to act quickly if a pipe freezes or bursts.
Dealing With Frozen or Burst Pipes
When water freezes, it expands by about 10%, putting immense pressure on pipes and often causing them to burst. Spotting the signs early can help minimize damage.
If you suspect a pipe has frozen, start by gradually warming the area. Use a hair dryer or open cabinet doors to let warm air circulate around the pipe.
For burst pipes, look for visible leaks, pools of water, or a sudden drop in water pressure. The first step is to shut off your main water valve immediately to limit water damage.
Once the water is off, call a licensed plumber as soon as possible. Fixing burst pipes requires professional expertise to ensure the repairs are done correctly and can withstand future cold spells. Keep in mind that repairs for pipes on your property are your responsibility - not the water utility’s.
If you’re dealing with an emergency outside of regular business hours, services like 24/7 Plumbers Near Me can connect you with reliable professionals at any time. This nationwide service helps you find skilled plumbers in your area quickly, ensuring you get prompt help for burst pipes or major leaks.
Conclusion: Stay Ready and Avoid Winter Plumbing Problems
Taking proactive steps now can save you from expensive winter plumbing repairs later. By addressing potential issues early, you can protect your home from cold-weather plumbing disasters. Start by pinpointing vulnerable areas and testing your shutoff valves to ensure they're functional before an emergency arises. Even small leaks or drips should be repaired promptly, as they can escalate when temperatures drop.
Insulation is key to keeping your plumbing safe. Cover exposed pipes, add faucet covers to outdoor spigots, and disconnect garden hoses before freezing weather sets in. Don’t forget to drain and winterize your sprinkler system to safeguard underground pipes from freezing and cracking.
While prevention is crucial, knowing when to bring in a professional is just as important. If you notice persistent leaks or sudden pressure changes, it’s time to contact a licensed plumber. Serious issues like major blockages, heater failures, or burst pipes require expert attention to prevent further damage.
For emergencies that can’t wait, services like 24/7 Plumbers Near Me are available around the clock to connect you with trusted professionals who can handle urgent plumbing problems, whether it's frozen pipes or burst lines. Quick action in these situations can significantly reduce water damage and get your plumbing system back in working order.
Finally, don’t overlook routine maintenance. Regularly checking your plumbing, water heater, and sump pump before winter hits can help you avoid last-minute emergencies and keep your home running smoothly throughout the season. With these measures in place, your home will be ready to face whatever winter throws its way.
FAQs
How can I tell if my pipes might freeze, and what steps should I take to prevent it?
Pipes are especially vulnerable to freezing in cold weather, particularly in unheated spots like garages, basements, or crawl spaces. You might notice frost forming on the pipes or experience reduced water flow - like a faucet only producing a small trickle. These are telltale signs that your pipes could be freezing.
To help prevent this, maintain a steady indoor temperature and let faucets drip slightly to keep water moving. Adding insulation to exposed pipes and sealing drafts in colder areas can also make a big difference. If you think a pipe has already frozen, don’t try to force it to thaw. Instead, call a professional plumber right away. For emergencies, services like 24/7 Plumbers Near Me can connect you with reliable plumbers who are available anytime to handle the situation promptly.
What’s the best way to insulate pipes in unheated areas to prevent freezing during winter?
To keep pipes in unheated spaces from freezing, cover them with foam pipe insulation, fiberglass sleeves, or foam rubber insulation. These materials create a barrier that helps retain heat. Make sure the insulation stays secure by fastening it with tape, zip ties, or adhesive strips every 1–2 feet.
If you're dealing with extremely cold weather, you can add an extra layer of protection by using heat tape along with the insulation. Heat tape provides a steady source of warmth, making it especially useful in areas where temperatures plunge. These precautions can save you from expensive repairs and protect your plumbing system throughout the winter.
How do I winterize my sprinkler system to protect it from freezing temperatures?
To get your sprinkler system ready for winter and protect it from freezing temperatures, here’s what you need to do:
- Shut off the main water supply to your sprinkler system. This stops water from flowing into the pipes and reduces the risk of freezing.
- Drain any leftover water from pipes, sprinklers, and hoses. Frozen water can expand and cause cracks or damage.
- If your system uses the blowout method, use an air compressor to clear out any remaining water. Attach the compressor to the system and blow water out through the sprinkler heads.
- Insulate exposed parts like valves and backflow preventers. Foam insulation or similar materials work well to protect these components from freezing temperatures.
These steps can help you avoid burst pipes and expensive repairs during the colder months. If you’re unsure how to handle this or need help, you can always call in a professional. Services like 24/7 Plumbers Near Me are available to connect you with experienced plumbers who can assist with winterizing your system or other urgent plumbing needs.