10 Tips to Prevent Frozen Pipes in Winter
Frozen pipes can cause serious damage and expensive repairs, but you can prevent this with simple steps. Here’s how to protect your home during winter:
- Insulate pipes: Focus on exposed areas like basements, crawl spaces, and garages. Use foam sleeves or fiberglass wrap for better protection.
- Seal gaps: Close cracks near pipes, especially around exterior walls and utility openings, to block cold air.
- Keep your home warm: Maintain a minimum temperature of 68°F, even when you’re away.
- Let faucets drip: A slow drip keeps water moving, reducing freezing risks.
- Open cabinet doors: Allow warm air to circulate around pipes under sinks.
- Disconnect outdoor hoses: Drain and store them indoors to prevent freezing.
- Shut off exterior water: Turn off and drain outdoor faucets and sprinkler systems.
- Use heating cables: Add electric heating cables to pipes in high-risk areas.
- Safely use space heaters: Focus heat on vulnerable pipes but follow safety guidelines.
- Know your main water shut-off valve: Quickly stop water flow in case of a burst pipe.
Quick Tip: Winter prep saves money and stress. Insulation costs as little as $2–$4 per 6 feet, while a burst pipe can cost over $23,000 in repairs. Start early to avoid emergencies.
6 Tips to Prevent Your Pipes From Freezing!
1. Insulate Exposed Pipes
Insulating your pipes is a straightforward way to reduce heat loss and keep them from freezing. When water freezes, it expands, and that expansion can lead to burst pipes - a costly and inconvenient problem.
Where Should You Insulate?
Start by focusing on pipes in unheated areas like basements, crawl spaces, attics, and garages. Pipes along exterior walls or under kitchen and bathroom cabinets near outside walls are also vulnerable. These are the areas where insulation can make the biggest difference.
Picking the Right Insulation Material
For most situations, polyethylene or neoprene sleeves are a great choice. They’re easy to install and cost around $10–$15. However, if you’re dealing with a gas water heater, you’ll need to follow specific safety guidelines. Use 1-inch unfaced fiberglass wrap for pipes within 8 inches of the flue, and ensure there’s at least 6 inches of space between the insulation and the flue.
How to Insulate Your Pipes
- Measure and Cut: Begin by measuring the length of the pipes you want to insulate. Pay special attention to all accessible hot water pipes, especially the first 3 feet from your water heater, as well as the first 3 feet of cold-water inlet pipes. Cut the insulation material to size using scissors or a utility knife.
- Install and Secure: Slide foam sleeves over the pipes with the seam facing downward to prevent moisture from getting in. For fiberglass wrap, wear protective clothing to avoid irritation. Secure the insulation in place using duct tape, cable ties, or wire at intervals of about a foot or two. If you’re using fiberglass wrap, aluminum foil tape works best for securing it.
Insulating your hot water pipes doesn’t just protect them from freezing - it also helps your water stay 2°F–4°F warmer, which could save you 3%–4% on energy costs annually. And most importantly, it gives you peace of mind knowing your pipes are better equipped to handle freezing temperatures.
2. Seal Gaps and Cracks
Even the smallest gaps can let in cold air, which can freeze exposed pipes. These tiny openings are especially problematic in areas like basements, crawl spaces, and garages. Sealing these gaps is a key step that works alongside other winterproofing efforts to protect your home.
Where to Focus Your Sealing Efforts
Pay close attention to spots where pipes enter your home, such as through foundation walls or siding. Also, check utility openings where cables or pipes pass through walls. Ensure windows and doors near plumbing are properly sealed, and close crawl space vents when temperatures drop to prevent cold air from creeping in. Don’t overlook gaps under kitchen and bathroom sinks where air can slip behind counters.
Choosing the Right Sealing Material
For gaps smaller than 1/4 inch, caulk is the best choice. Use waterproof silicone or latex caulk in wet indoor spaces. For larger gaps - up to 3 inches - expanding spray foam works well. After applying, trim any excess foam for a clean finish.
Special Considerations for High-Heat Areas
Standard caulk won’t cut it around high-heat spots like furnace flues, fireplace chimneys, or gas-fired water heater vents. Instead, use high-temperature caulk or fire-resistant materials such as sheet metal or furnace cement caulk to ensure safe and effective sealing.
Application Tips for Better Results
To make caulking easier, cut the nozzle at a 45° angle and, if it’s cold, warm the tube in hot water for about 10 minutes before use. Adding weatherstripping around windows and doors can also block drafts that might reach your pipes.
Sealing gaps and cracks creates an important barrier against cold air, helping to keep your pipes safe and your home winter-ready.
3. Keep Your Home Heated
Keeping your home warm during winter isn’t just about comfort - it’s essential for protecting your plumbing. Your heating system helps create a warm environment around pipes, reducing the risk of freezing.
Setting the Right Temperature
Set your thermostat to at least 68°F. This baseline ensures your home stays warm enough to protect pipes, especially those in areas like unheated basements, crawl spaces, or garages. Pipes can freeze even when outdoor temperatures are above 20°F, particularly if they’re uninsulated or located in cold interior spaces. In these vulnerable spots, consider raising the temperature a bit more to be safe.
Maintain a consistent temperature throughout the day and night, even when you’re not home. Sudden temperature drops can cause freezing, especially during unexpected cold snaps. If you’re away, don’t lower your thermostat below 55°F (12°C) to keep pipes safe from freezing. This is especially important for pipes in unheated or poorly insulated areas. Additionally, turning up the heat can help thaw pipes inside walls if they’ve already started to freeze.
Up next, find out how letting faucets drip can further reduce the risk of frozen pipes.
4. Let Faucets Drip
When temperatures plummet, a dripping faucet can be your plumbing’s best friend. Moving water is less likely to freeze, and the steady drip helps relieve pressure in the pipes, reducing the chance of a burst.
Which Faucets Should Drip?
Focus on faucets connected to pipes in vulnerable areas - those along exterior walls or in unheated spaces like basements, crawl spaces, attics, or garages. Start with the faucet farthest from your main water supply .
“It’s most important to drip water on faucets supplied by pipes that run along exterior walls. These are the pipes most exposed to extreme temperatures, and, therefore, most likely to burst.”
– Aaron Adams, Master Plumber and CEO of Aaron Services: Plumbing, Heating, Cooling
How Much Water Should Drip?
A slow drip - about 1–2 drops per second - is all you need. If you have a single-handle faucet, set it to allow both hot and cold water to drip. Begin this process when temperatures dip to 20°F (-6°C) or lower.
“If water isn’t flowing through either the hot or the cold, then you won’t have any freeze protection for those pipes.”
– Enoch Heise, Journeyman Plumber, Legacy Plumbing
This small action keeps water circulating, pulling slightly warmer water from underground lines and reducing the risk of freezing. Even a minor freeze in one section of a pipe can cause significant issues, even if the rest of your plumbing remains functional.
Up next: Discover how opening cabinet doors can help protect your interior pipes.
5. Open Cabinet Doors
Leaving cabinet doors open under sinks can help prevent your pipes from freezing by allowing warm air to circulate around them. When cabinet doors are closed, they trap cold air inside and block the flow of heat, increasing the chance of frozen pipes.
As Buy Freeze Miser explains:
“A key area in your home where you should keep the cabinets open during freezing weather is around any pipes that are located within them. In particular, cabinets located underneath sinks in your kitchen or bathrooms tend to have a lot of exposed plumbing, making it especially important to keep these areas open.”
This simple step is even more effective when paired with keeping your home’s temperature at a safe level. Many homeowners have found this tip to be a reliable way to protect pipes during extreme cold.
Insurance experts also highlight the importance of this practice:
“Keeping room and cabinet doors open can also help heat to circulate and warm the areas where pipes are located.”
For extra precaution, clear out any stored items that could block airflow around the pipes. And if you’re planning to be away during the winter, set your thermostat to at least 68°F and leave those cabinet doors open.
Up next, find out why disconnecting outdoor hoses is another crucial step in protecting your home.
6. Disconnect and Drain Outdoor Hoses
As part of your winter preparation, it’s crucial to protect your outdoor plumbing by disconnecting and draining all outdoor hoses. This simple step can help you avoid frozen water causing costly damage to your pipes.
Start by removing all garden hoses from outdoor faucets before the first freeze. Even if a hose seems empty, water can remain in low spots or connections. When temperatures drop, this trapped water can freeze, expand, and push pressure back into your home’s plumbing, potentially cracking pipes hidden in your walls.
Once disconnected, make sure to drain each hose completely. To do this, lift one end to let any remaining water flow out, then coil the hose and store it indoors. Both rubber and vinyl hoses are prone to cracking if left outside in freezing conditions, leaving you with damaged equipment come spring.
Next, turn off the water supply to outdoor spigots. The shut-off valve is typically found inside your home, often in the basement or crawl space. After shutting off the supply, open the outdoor faucet to let any remaining water drain out.
Don’t forget to winterize your sprinkler systems and any outdoor water features. Freezing water can wreak havoc on these systems, so ensure they’re drained and prepped for the cold months ahead.
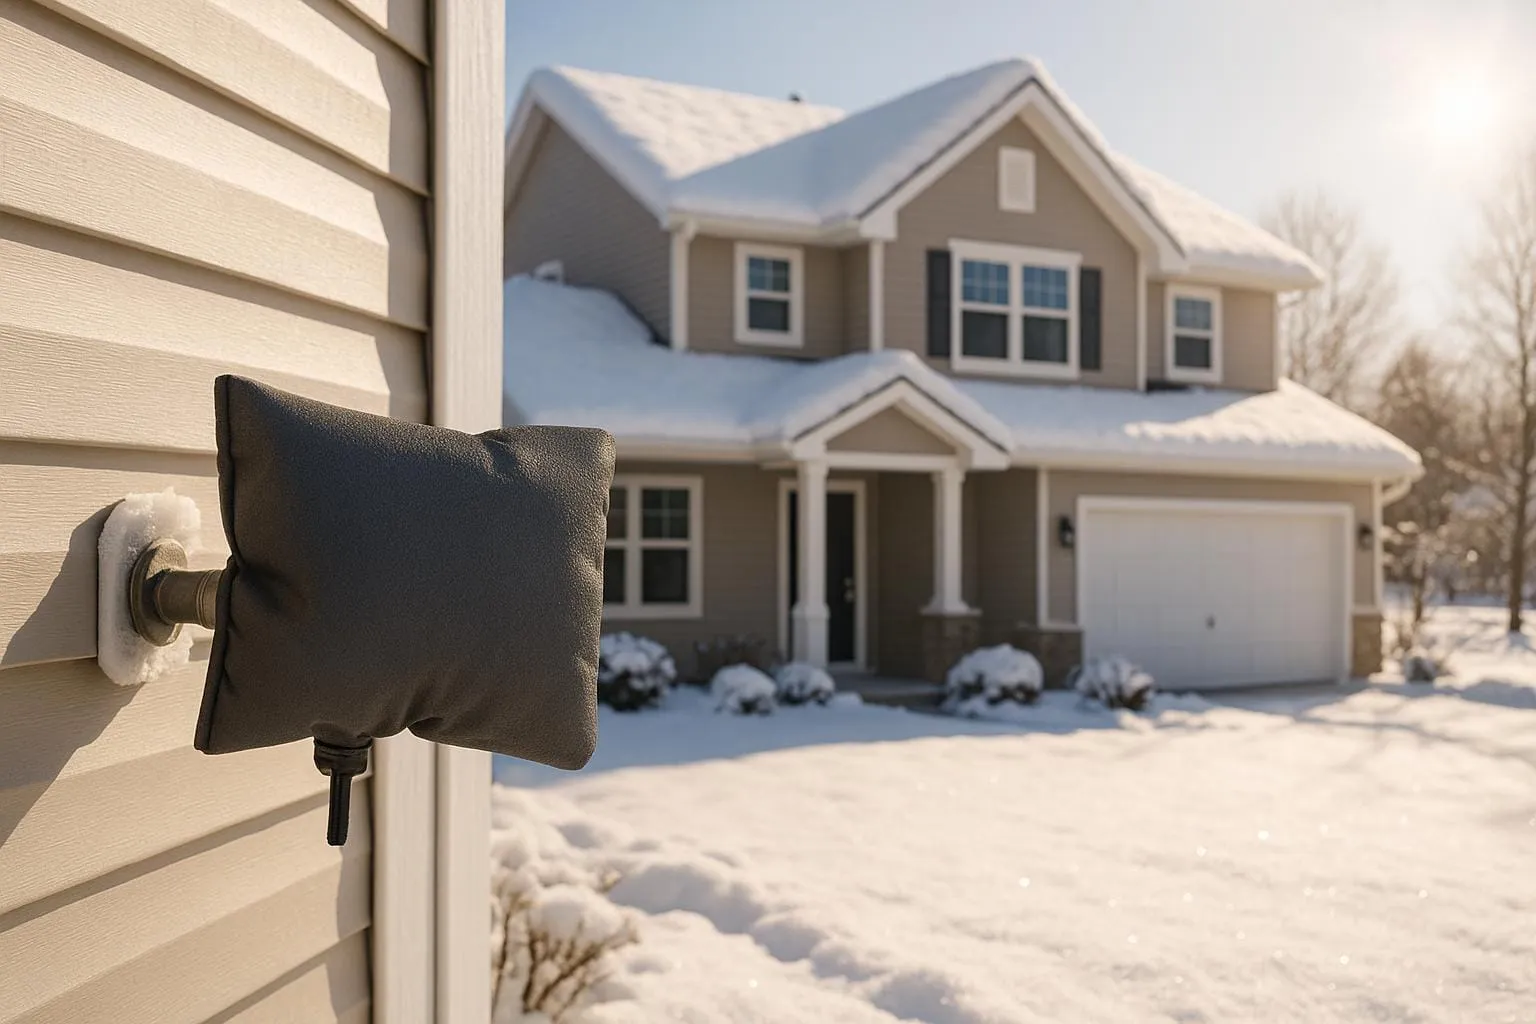
If your home doesn’t have interior shut-off valves for outdoor faucets, consider installing frost-free spigots or using foam faucet covers for added protection.
Make sure to take these steps before temperatures dip below 32°F to safeguard your plumbing. And if something unexpected happens, 24/7 Plumbers Near Me (https://247plumbernearme.net) is ready to connect you with reliable emergency plumbers anytime you need them.
7. Shut Off and Drain Exterior Water Valves
After disconnecting your outdoor hoses, the next step is to make sure your exterior water lines are ready to handle freezing temperatures.
Start by shutting off the water supply to your outdoor faucets and spigots to avoid water sitting in the pipes, which can freeze and cause costly damage to your plumbing system. Locate the interior shut-off valves that control the flow to your outdoor faucets. These are typically found in basements, crawl spaces, or utility rooms, near the point where the pipe exits your home. Look for a small valve handle or lever on the pipe. Most homes built after 1960 include these valves, but older homes may not.
Turn the valve clockwise to shut it off, but be careful not to over-tighten it, as that can cause damage. If the valve is stuck, apply a bit of penetrating oil and wait about 15 minutes before trying again.
Once the interior valve is closed, head outside to drain any remaining water from the pipes. Open each outdoor faucet fully to let trapped water flow out. You’ll likely see an initial surge of water - let it run until the flow stops completely. It’s important to leave the faucets open for several minutes to ensure they’re fully drained.
If your home has multiple outdoor water sources, like front and back spigots, pool fill lines, or connections for an outdoor kitchen, repeat this process for each one. Skipping any of these could result in frozen pipes, leading to expensive repairs.
For homes with a sprinkler system, this step is even more critical. Irrigation lines, often installed near the surface, are particularly prone to freezing. While some sprinkler systems require professional winterization, shutting off the main water supply is a basic yet essential step.
Leave your outdoor faucets open throughout the winter. This prevents pressure buildup from any minor water accumulation and makes it easier to check if water is still flowing - an indication that the interior valve may not be fully closed.
Complete this task before nighttime temperatures drop below 32°F. In northern states, this usually means early to mid-October, while in southern areas, it might be later in November or December.
If you encounter any issues, you can reach out to 24/7 Plumbers Near Me (https://247plumbernearme.net) for emergency help.
8. Install Pipe Heating Cables
When it comes to protecting pipes in extreme cold, electric heating cables are a reliable solution to prevent freezing. These cables work as an added layer of protection alongside other winterproofing methods, ensuring your plumbing stays safe during harsh conditions.
Heating cables function by generating heat through electrical resistance. Many are designed to self-regulate, automatically turning on when temperatures approach freezing and shutting off once conditions are safe again.
To get started, measure the length of the pipe you need to protect and choose a heating cable that matches the manufacturer’s guidelines. These cables are available in various pre-cut lengths, so selecting the correct size is essential for full coverage. For installation, wrap the cable around the pipe in a spiral pattern, leaving a 12-inch gap between each loop. For pipes under 2 inches in diameter, you can run the cable straight along the bottom instead. Secure the cable with electrical tape or the plastic ties provided in most kits. Be careful not to overlap the cable, as this can create hot spots that may damage both the cable and the pipe.
Once installed, plug the cable into a GFCI-protected outlet. If you don’t have one available, it’s best to hire a licensed electrician to install one. While many heating cables come with a standard plug, some require hardwiring, which should always be handled by a professional.
For outdoor pipes, make sure to use cables specifically rated for outdoor use, featuring UV-resistant jackets to withstand the elements. Indoor-rated cables are better suited for spaces like basements, crawl spaces, or other areas where pipes are at risk of freezing.
Safety should always be a priority when working with electrical heating systems. Avoid installing heating cables on pipes carrying flammable liquids and follow all manufacturer instructions, including guidelines for maximum operating temperatures. Regularly inspect the cables for wear and tear, such as cracks or kinks in the insulation, to prevent electrical issues or fire hazards.
Repairing burst pipes can be both expensive and disruptive, making preventive steps like heating cables a smart investment. If you’re unsure about the installation process or run into any challenges, you can contact professionals like 24/7 Plumbers Near Me (https://247plumbernearme.net) for assistance.
Up next, find out how to safely use space heaters to provide extra protection.
9. Use Space Heaters Safely
Space heaters can provide focused warmth to help protect vulnerable pipes, but using them improperly can lead to fire or electrical hazards. When handled with care, these portable heaters are an effective way to safeguard plumbing in areas like basements, attics, and garages. They work well as part of a broader winterproofing strategy to keep your pipes safe.
Place space heaters in rooms where pipes are exposed to cold, such as along exterior walls or in unheated spaces like basements and garages. Aim the heater toward the plumbing you want to protect, allowing warm air to circulate around the most at-risk sections of pipe.
To ensure safety, always keep space heaters at least three feet away from flammable materials like curtains, paper, furniture, or other stored items. Never leave them running unattended, as this significantly increases the risk of fire.
Avoid using open flame devices like blowtorches or kerosene, propane, and charcoal heaters to warm pipes. These can be extremely dangerous and are not recommended for this purpose.
Electrical safety is equally important, especially in damp areas. If you’re using a space heater in a bathroom or other moisture-prone space, make sure to plug it into an outlet equipped with a ground-fault circuit interrupter (GFCI). Avoid using extension cords to reduce the risk of electrical accidents.
For a safer option, consider oil-filled radiators. These heaters provide steady, even warmth and are generally less risky than other types of space heaters.
Next, discover why locating your main water shut-off valve is a key step in winter pipe safety.
10. Know Your Main Water Shut-Off Valve
Being familiar with your main water shut-off valve can save you from expensive water damage. If a pipe bursts, water can gush out at a staggering 10 gallons per minute, flooding your home in no time.
The main shut-off valve controls the water supply to your entire house. Turning it off quickly can halt water flow to a damaged pipe, minimizing harm while you wait for a plumber to arrive.
Locating your shut-off valve depends on where you live and how your home is built. In warmer areas, it’s usually outside near the water meter, close to the street or property line. In colder climates, you’ll likely find it indoors, where the main water line enters your house - commonly in the basement, crawl space, or utility room near the water heater.
The valve comes in two main types: a wheel-shaped gate valve, which you turn clockwise, or a lever-style ball valve, which you rotate 90 degrees. The newer ball valves are quicker and easier to operate.
To ensure it works when you need it, test the valve once a year and mark its location clearly so everyone in your household knows where to find it in an emergency. If the valve is stiff or doesn’t completely stop the water flow, call a plumber to replace it before winter sets in.
For better visibility, you can attach a bright tag to the valve or paint the area around it. Emergencies can be chaotic, and clear markers can save precious time. Keep a wrench or valve key nearby - special water meter keys are available for around $10–$15.
If your pipes freeze and burst despite your best efforts, don’t worry - help is available. 24/7 Plumbers Near Me connects you with emergency plumbers who can respond immediately to burst pipes and water damage, ensuring you get expert assistance when you need it most.
Check out the comparison table next for a quick overview of all prevention tips.
Comparison Table
Here’s a quick guide to help you compare insulation materials and evaluate the risk levels of various pipe locations in your home. The first table breaks down insulation options, while the second highlights areas that may need extra attention during colder months.
Pipe Insulation Materials Comparison
{{table:eyJoZWFkZXJzIjpbIk1hdGVyaWFsIiwiQ29zdCAocGVyIDYgZnQpIiwiSW5zdGFsbGF0aW9uIiwiRWZmZWN0aXZlbmVzcyIsIlByb3MiLCJDb25zIl0sInJvd3MiOltbIkZvYW0gUGlwZSBTbGVldmVzIiwiJDLigJMkNCIsIkVhc3kgRElZIiwiR29vZCBpbiBtb2RlcmF0ZSBjb2xkIiwiUHJlLXNsaXQgZm9yIGVhc3kgdXNlLCBhZmZvcmRhYmxlLCByZXVzYWJsZSIsIlByb25lIHRvIGNyYWNraW5nIG92ZXIgdGltZTsgbGVzcyBlZmZlY3RpdmUgaW4gZXh0cmVtZSBjb2xkIl0sWyJGaWJlcmdsYXNzIFdyYXAiLCIkOOKAkyQxMiIsIk1vZGVyYXRlIERJWSIsIkV4Y2VsbGVudCIsIkdyZWF0IGZvciBzZXZlcmUgY29sZDsgZHVyYWJsZSIsIlJlcXVpcmVzIHRhcGUvdGllczsgY2FuIGlycml0YXRlIHNraW47IGhpZ2hlciB1cGZyb250IGNvc3QiXSxbIkhlYXQgVGFwZS9DYWJsZSIsIiQxNeKAkyQyNSIsIk1vZGVyYXRlIERJWSIsIkV4Y2VsbGVudCIsIlByb3ZpZGVzIGFjdGl2ZSBoZWF0aW5nIHdpdGggdGhlcm1vc3RhdCBjb250cm9sIiwiVXNlcyBtb3JlIGVsZWN0cmljaXR5OyBuZWVkcyBhbiBvdXRsZXQ7IG11c3QgYmUgaGFuZGxlZCBjYXJlZnVsbHkiXSxbIlJ1YmJlciBQaXBlIEluc3VsYXRpb24iLCIkNeKAkyQ4IiwiRWFzeSBESVkiLCJWZXJ5IEdvb2QiLCJGbGV4aWJsZSwgbW9pc3R1cmUtcmVzaXN0YW50LCBzZWxmLXNlYWxpbmciLCJMaW1pdGVkIHNpemUgb3B0aW9uczsgcHJpY2llciB0aGFuIGZvYW0iXV19}}
Pipe Location Risk Assessment
Understanding which parts of your home are most vulnerable to freezing can help you prioritize protection.
{{table:eyJoZWFkZXJzIjpbIkxvY2F0aW9uIiwiUmlzayIsIlRlbXAgUmFuZ2UiLCJQcmlvcml0eSBMZXZlbCIsIlJlY29tbWVuZGVkIEFjdGlvbiJdLCJyb3dzIjpbWyJFeHRlcmlvciBXYWxscyIsIlZlcnkgSGlnaCIsIlNpbWlsYXIgdG8gb3V0ZG9vciB0ZW1wcyIsIkNyaXRpY2FsIiwiSW5zdWxhdGUgcGlwZXMsIG9wZW4gY2FiaW5ldCBkb29ycywgY29uc2lkZXIgaGVhdCB0YXBlIl0sWyJVbmhlYXRlZCBCYXNlbWVudHMiLCJIaWdoIiwiMzXigJM0NcKwRiIsIkhpZ2giLCJJbnN1bGF0ZSBwaXBlczsgc2VhbCBmb3VuZGF0aW9uIGNyYWNrcyJdLFsiQ3Jhd2wgU3BhY2VzIiwiSGlnaCIsIjMw4oCTNDDCsEYiLCJIaWdoIiwiSW5zdWxhdGUgcGlwZXMgYW5kIGZvdW5kYXRpb25zOyBpbXByb3ZlIHZlbnRpbGF0aW9uIl0sWyJBdHRpY3MiLCJIaWdoIiwiVmFyaWVzIHdpZGVseSIsIkhpZ2giLCJJbnN1bGF0ZSBwaXBlcywgaW1wcm92ZSBhdHRpYyBpbnN1bGF0aW9uLCBzZWFsIGxlYWtzIl0sWyJHYXJhZ2VzIiwiTWVkaXVtLUhpZ2giLCJTbGlnaHRseSBhYm92ZSBvdXRkb29yIHRlbXBzIiwiTWVkaXVtIiwiSW5zdWxhdGUgcGlwZXMsIHdlYXRoZXJzdHJpcCBnYXJhZ2UgZG9vcnMiXSxbIkludGVyaW9yIFdhbGxzIiwiTG93IiwiUm9vbSB0ZW1wZXJhdHVyZSIsIkxvdyIsIk1vbml0b3IgZHVyaW5nIHBvd2VyIG91dGFnZXM7IGJhc2ljIGluc3VsYXRpb24gc3VmZmljZXMiXSxbIkhlYXRlZCBCYXNlbWVudHMiLCJWZXJ5IExvdyIsIjYw4oCTNzDCsEYiLCJMb3ciLCJNaW5pbWFsIHByb3RlY3Rpb24gbmVlZGVkIl1dfQ==}}
For interior pipes, foam sleeves are a cost-effective choice, while heat tape is better reserved for pipes in high-risk areas like exterior walls or crawl spaces. By tailoring your approach, you can save on materials while ensuring your plumbing remains protected during winter.
These tables highlight the importance of a targeted strategy. For example, fiberglass wrap works well for moderately exposed pipes, while heat tape is ideal for areas that experience extreme cold. With the right materials and focused efforts, you can keep your pipes safe and your home running smoothly all season long.
Conclusion
Preparing your home for winter takes some effort, but it can save you from costly repairs and major headaches. From insulating pipes to being ready for emergencies, taking action before the cold sets in is essential.
Frozen pipes can lead to expensive repairs. The Insurance Institute for Business and Home Safety reports that a single burst pipe can cause $5,000 or more in water damage per incident. Thankfully, prevention is far cheaper than dealing with the aftermath.
Timing is everything. Get ahead of the first freeze by insulating pipes, sealing drafts, and testing your heating systems while the weather is still manageable. This proactive approach ensures your plumbing is ready for the challenges of winter.
Pay special attention to high-risk areas. Pipes in unheated spaces like basements, attics, garages, and exterior walls are the most vulnerable. Simple measures, such as opening cabinet doors under sinks or letting faucets drip during extreme cold, can make a big difference in these spots.
Even with thorough preparation, emergencies can happen. If you face a burst pipe, quick action is crucial. Services like 24/7 Plumbers Near Me can connect you with reliable professionals when you need them most.
FAQs
What are the best materials to insulate pipes during extremely cold winters?
When it comes to keeping pipes safe during harsh winters, materials like polyurethane foam, fiberglass, elastomeric foam, and cellular glass stand out as top choices. These materials are highly effective at providing thermal resistance, helping to prevent pipes from freezing even in extremely cold conditions.
Selecting the right insulation depends on your local climate and where the pipes are located. Beyond just preventing freezing, proper insulation can lower energy bills and shield your plumbing system from expensive repairs.
How do I find my main water shut-off valve to prevent water damage from frozen or burst pipes?
To find your main water shut-off valve, start by searching inside your home. It’s usually located in the basement, crawlspace, or near an exterior wall where the water line enters. Check along the front foundation wall or close to a hose bib. If you can’t spot it indoors, it might be outside, often near the water meter or where the water line connects to your house. Knowing exactly where this valve is can save you precious time during a plumbing emergency, like a burst pipe, and help minimize potential damage.
What safety measures should I follow when using heating cables to prevent frozen pipes?
When using heating cables to prevent your pipes from freezing, prioritizing safety is crucial. Start by selecting UL-listed heating cables, as these meet established safety standards. Be sure to carefully follow the manufacturer’s installation guidelines to ensure proper use. The cables should be attached directly to the pipe, and insulation should only be added if the manufacturer specifically advises it. Importantly, never allow the cables to overlap or cross, as this could pose a fire risk.
To maintain safety over time, inspect the cables regularly for signs of wear or damage. Additionally, only use the cables on pipe materials approved by the manufacturer. By using heating cables correctly, you can protect your pipes and keep them in working order all winter long.